Getting Started with Git and GitHub the Easy Way
What is Git?

Git helps you avoid being this guy. Git is a version control system that maintains a library of changes made to a file to help you keep track of everything that you edit. Essentially, version control works like this:
You create a file and make some changes. Each time you work on your file, you save the changes and the version control system merges those changes with the base file to produce the most recent file.
Credit: Software Carpentry
What if you are working on the file with a co-author? Version control has you covered. You and you co-author can work on your files at the same time, making all the changes you want.
Credit: Software Carpentry
When you each save your changes, just like before, the version control system merges those changes with the base file to produce the most recent file.

Credit: Software Carpentry
How does this help us be better scientists? It allows for collaboration on all file types and maintains a chronological record of all changes which facilitates open science. Writing your paper with a bunch of co-authors? No problem. Just host your document on GitHub and everyone can make changes to the manuscript and merge them all together with Git.
Shoot! Someone deleted something important? No problem. Just revert the document back to the version before the deletions were made.
Want to see how many regressions someone ran before finding the “true” model? Easy. Just go look at their analysis script on GitHub to see all the changes they made. That’s a scary thought, right? There’s a reason the Open Science Foundation allows GitHub integration on osf.io.
Getting Started
1. Create a GitHub Account

To get started, you’ll need to create a GitHub account. GitHub provides some pretty good benefits to students, including the ability to create private repositories, so you’ll want to register for a student account. To get started, click here. The setup process will walk you though several steps and after you create your account you will be able to apply for student benefits.
2. Installing Git
Having a GitHub account is necessary, be we also need to install Git on our computers so that we can work offline. Git can either be installed with bash commands in the Terminal/Command Prompt, but the easiest way is to install GitHub Desktop. Let’s download and install it now. For Windows click here. For MacOS click here. After you download the file, double click on it and follow the installation instructions.
The advantage of installing GitHub Desktop is that it allows you to use Git through terminal commands (which is the traditional way) or you can use the application which provides a nice user interface.
Creating a Repository
With your shiny new GitHub account and GitHub Desktop installed, you are ready to create your first repository. A repository is basically a folder for all of you files. Let’s get started by creating a repository on GitHub.com. You do this by clicking on “Create repository.”

The next screen will ask you to name your repository. I’m going to name my repository “first-project” and for the description I’ll write “My first project on GitHub.”
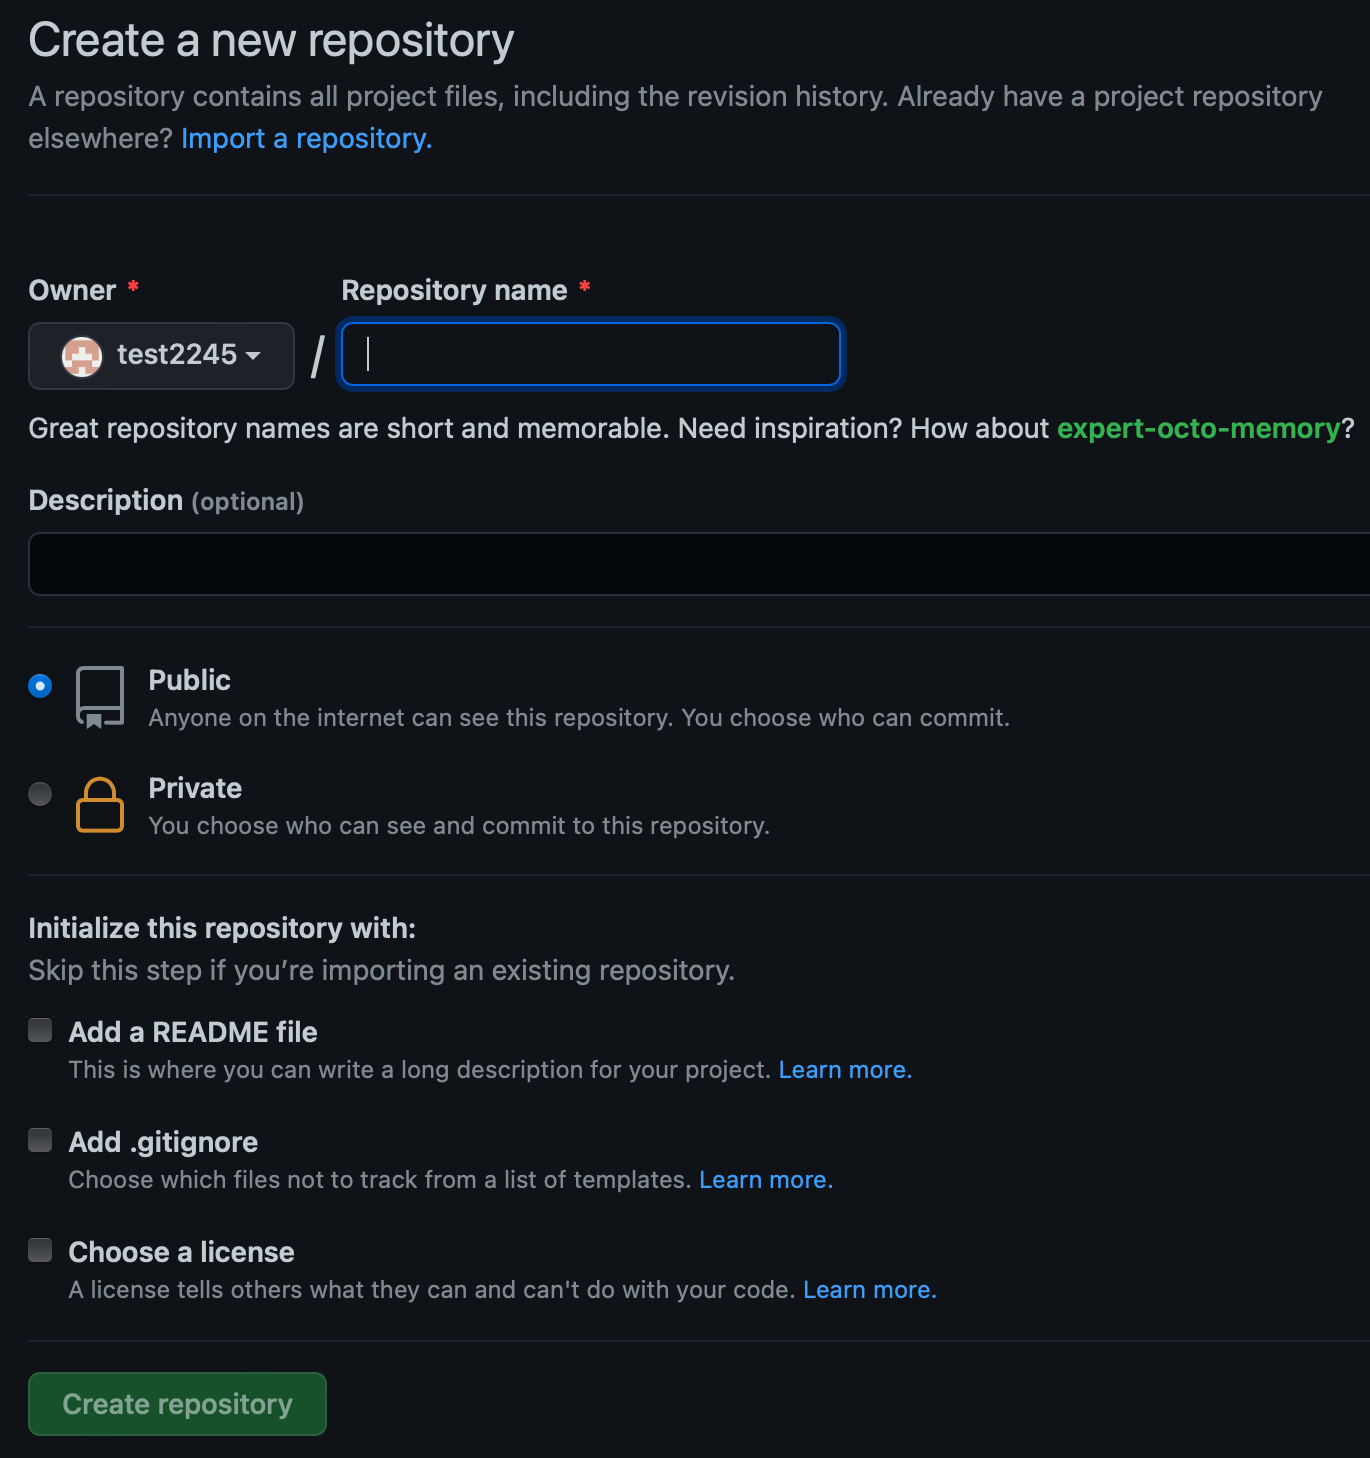
We won’t create them now, but I want to briefly explain what each of these options are:
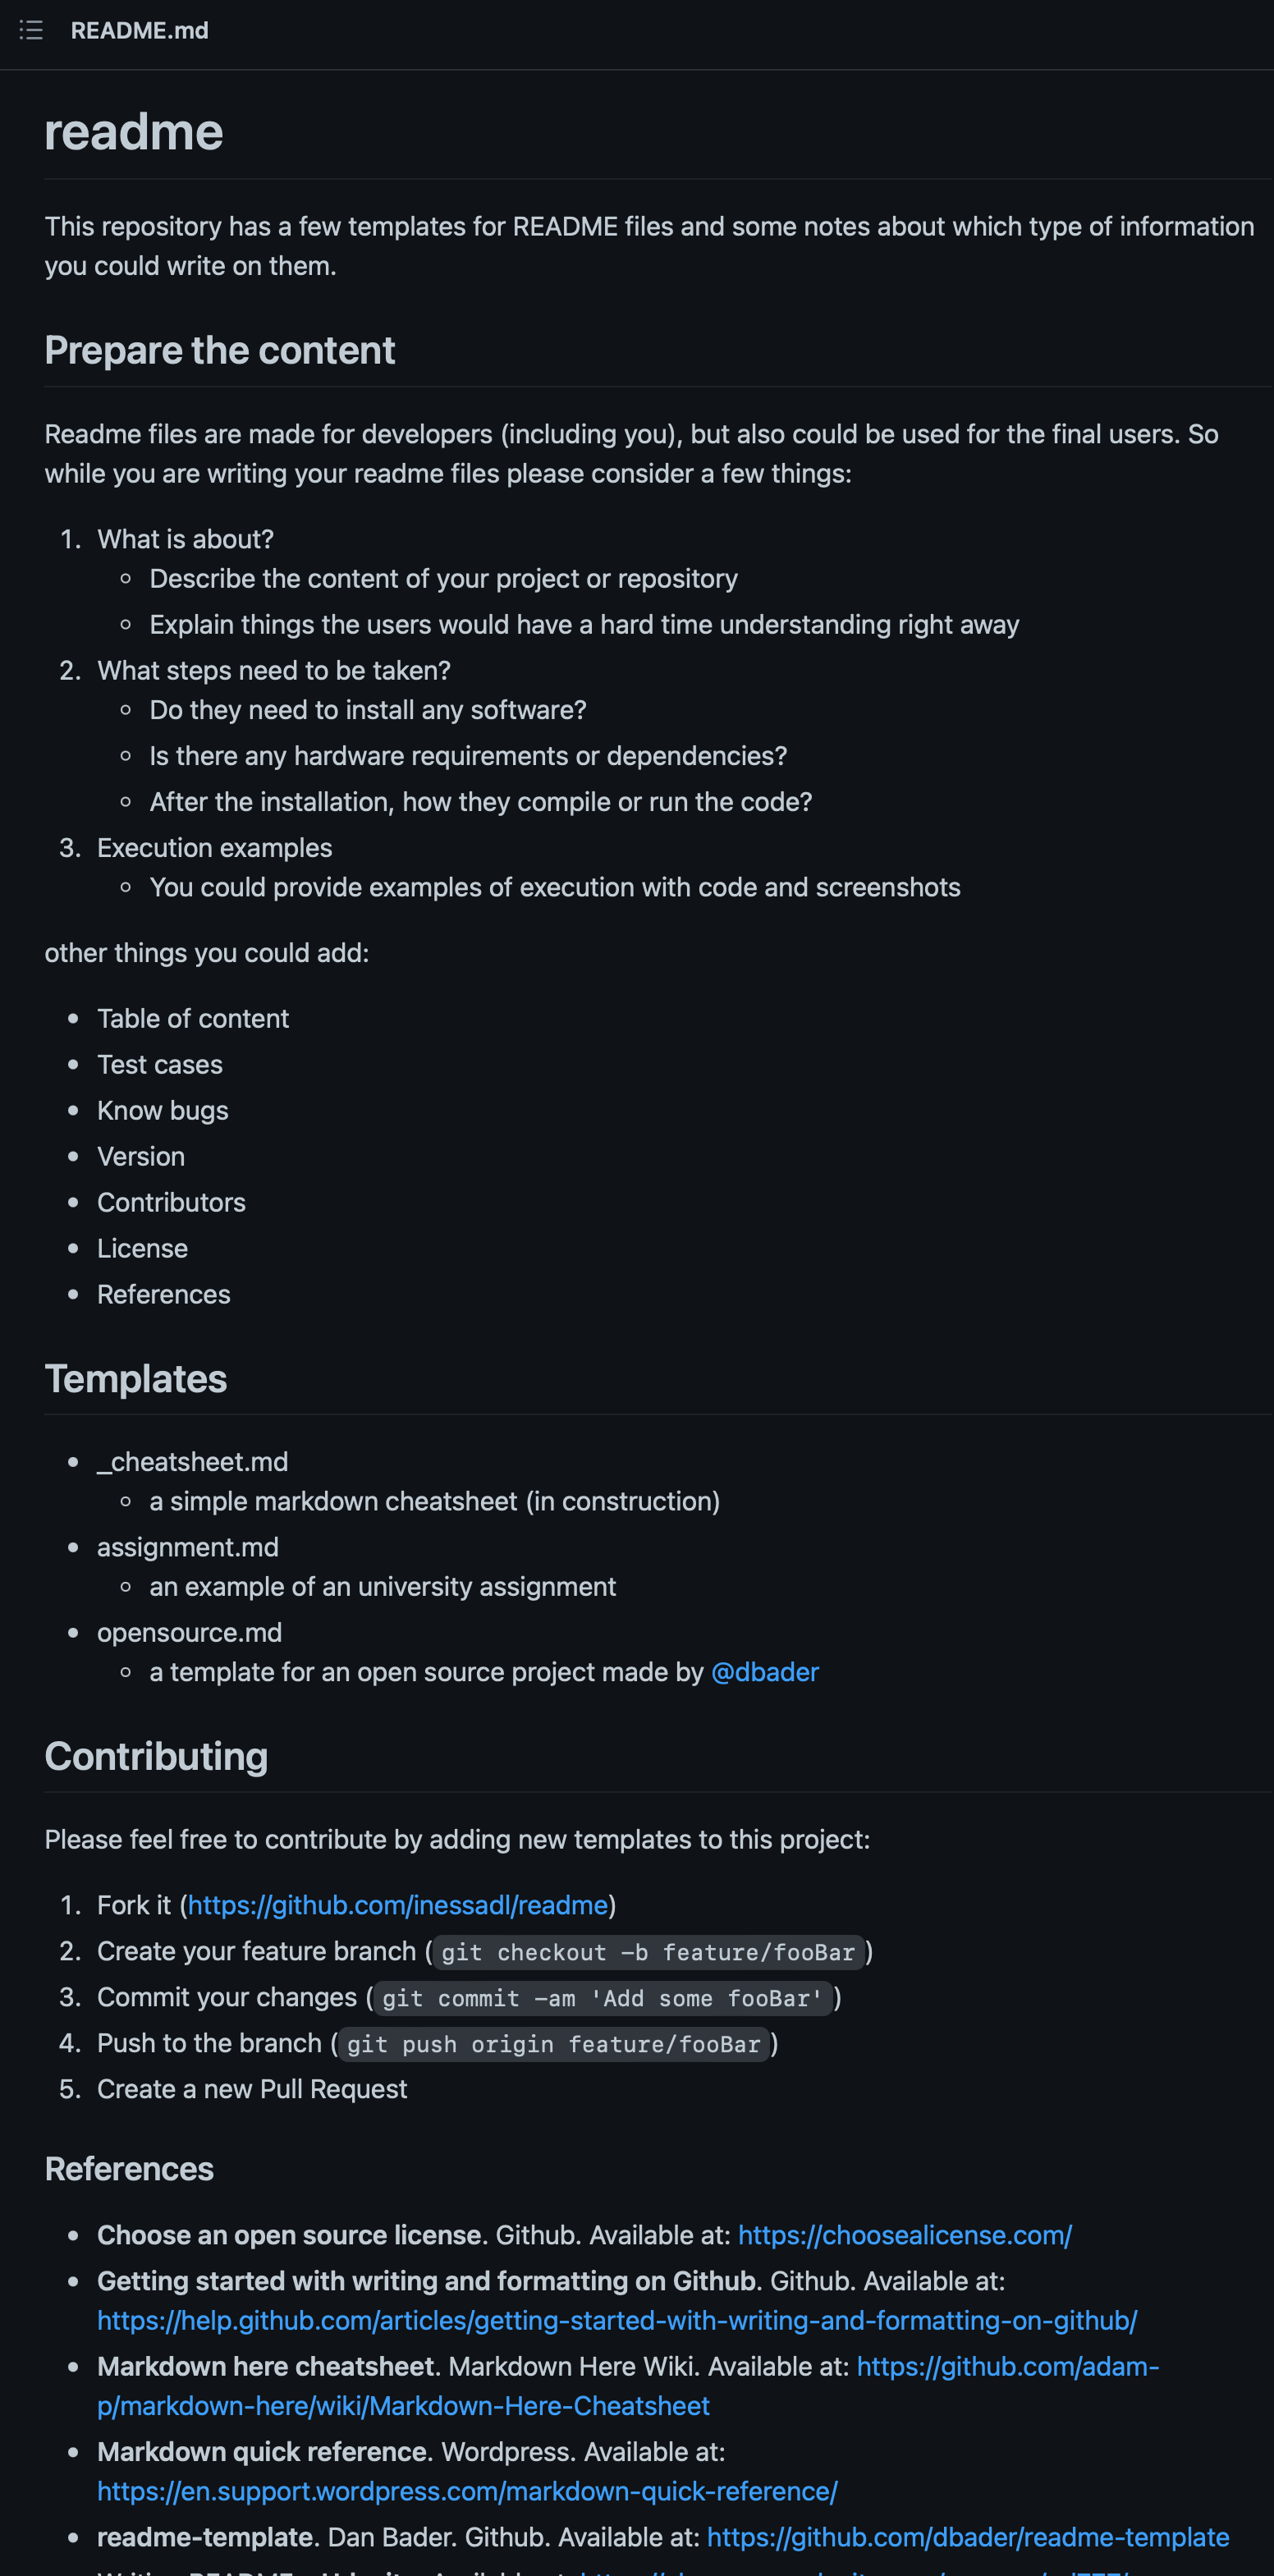
Add a README file: In general, it’s a good idea to add a README file to your projects. READMEs show up on the homepage of your repositories and are used to add detailed descriptions of what the repository is for and what files it contains. Here’s an example:
Add .gitignore: The .gitignore file is a list of folders or files in your repository that you want Git to ignore. In other words, Git won’t track any changes that are made to file in your .gitignore list.
Choose a license: This lets you pick a copyright license to apply to your repository.
After you enter a name and description, click “Create repository” and you’ve created your first GitHub repository! Once you do so, you’re greeted with this screen:
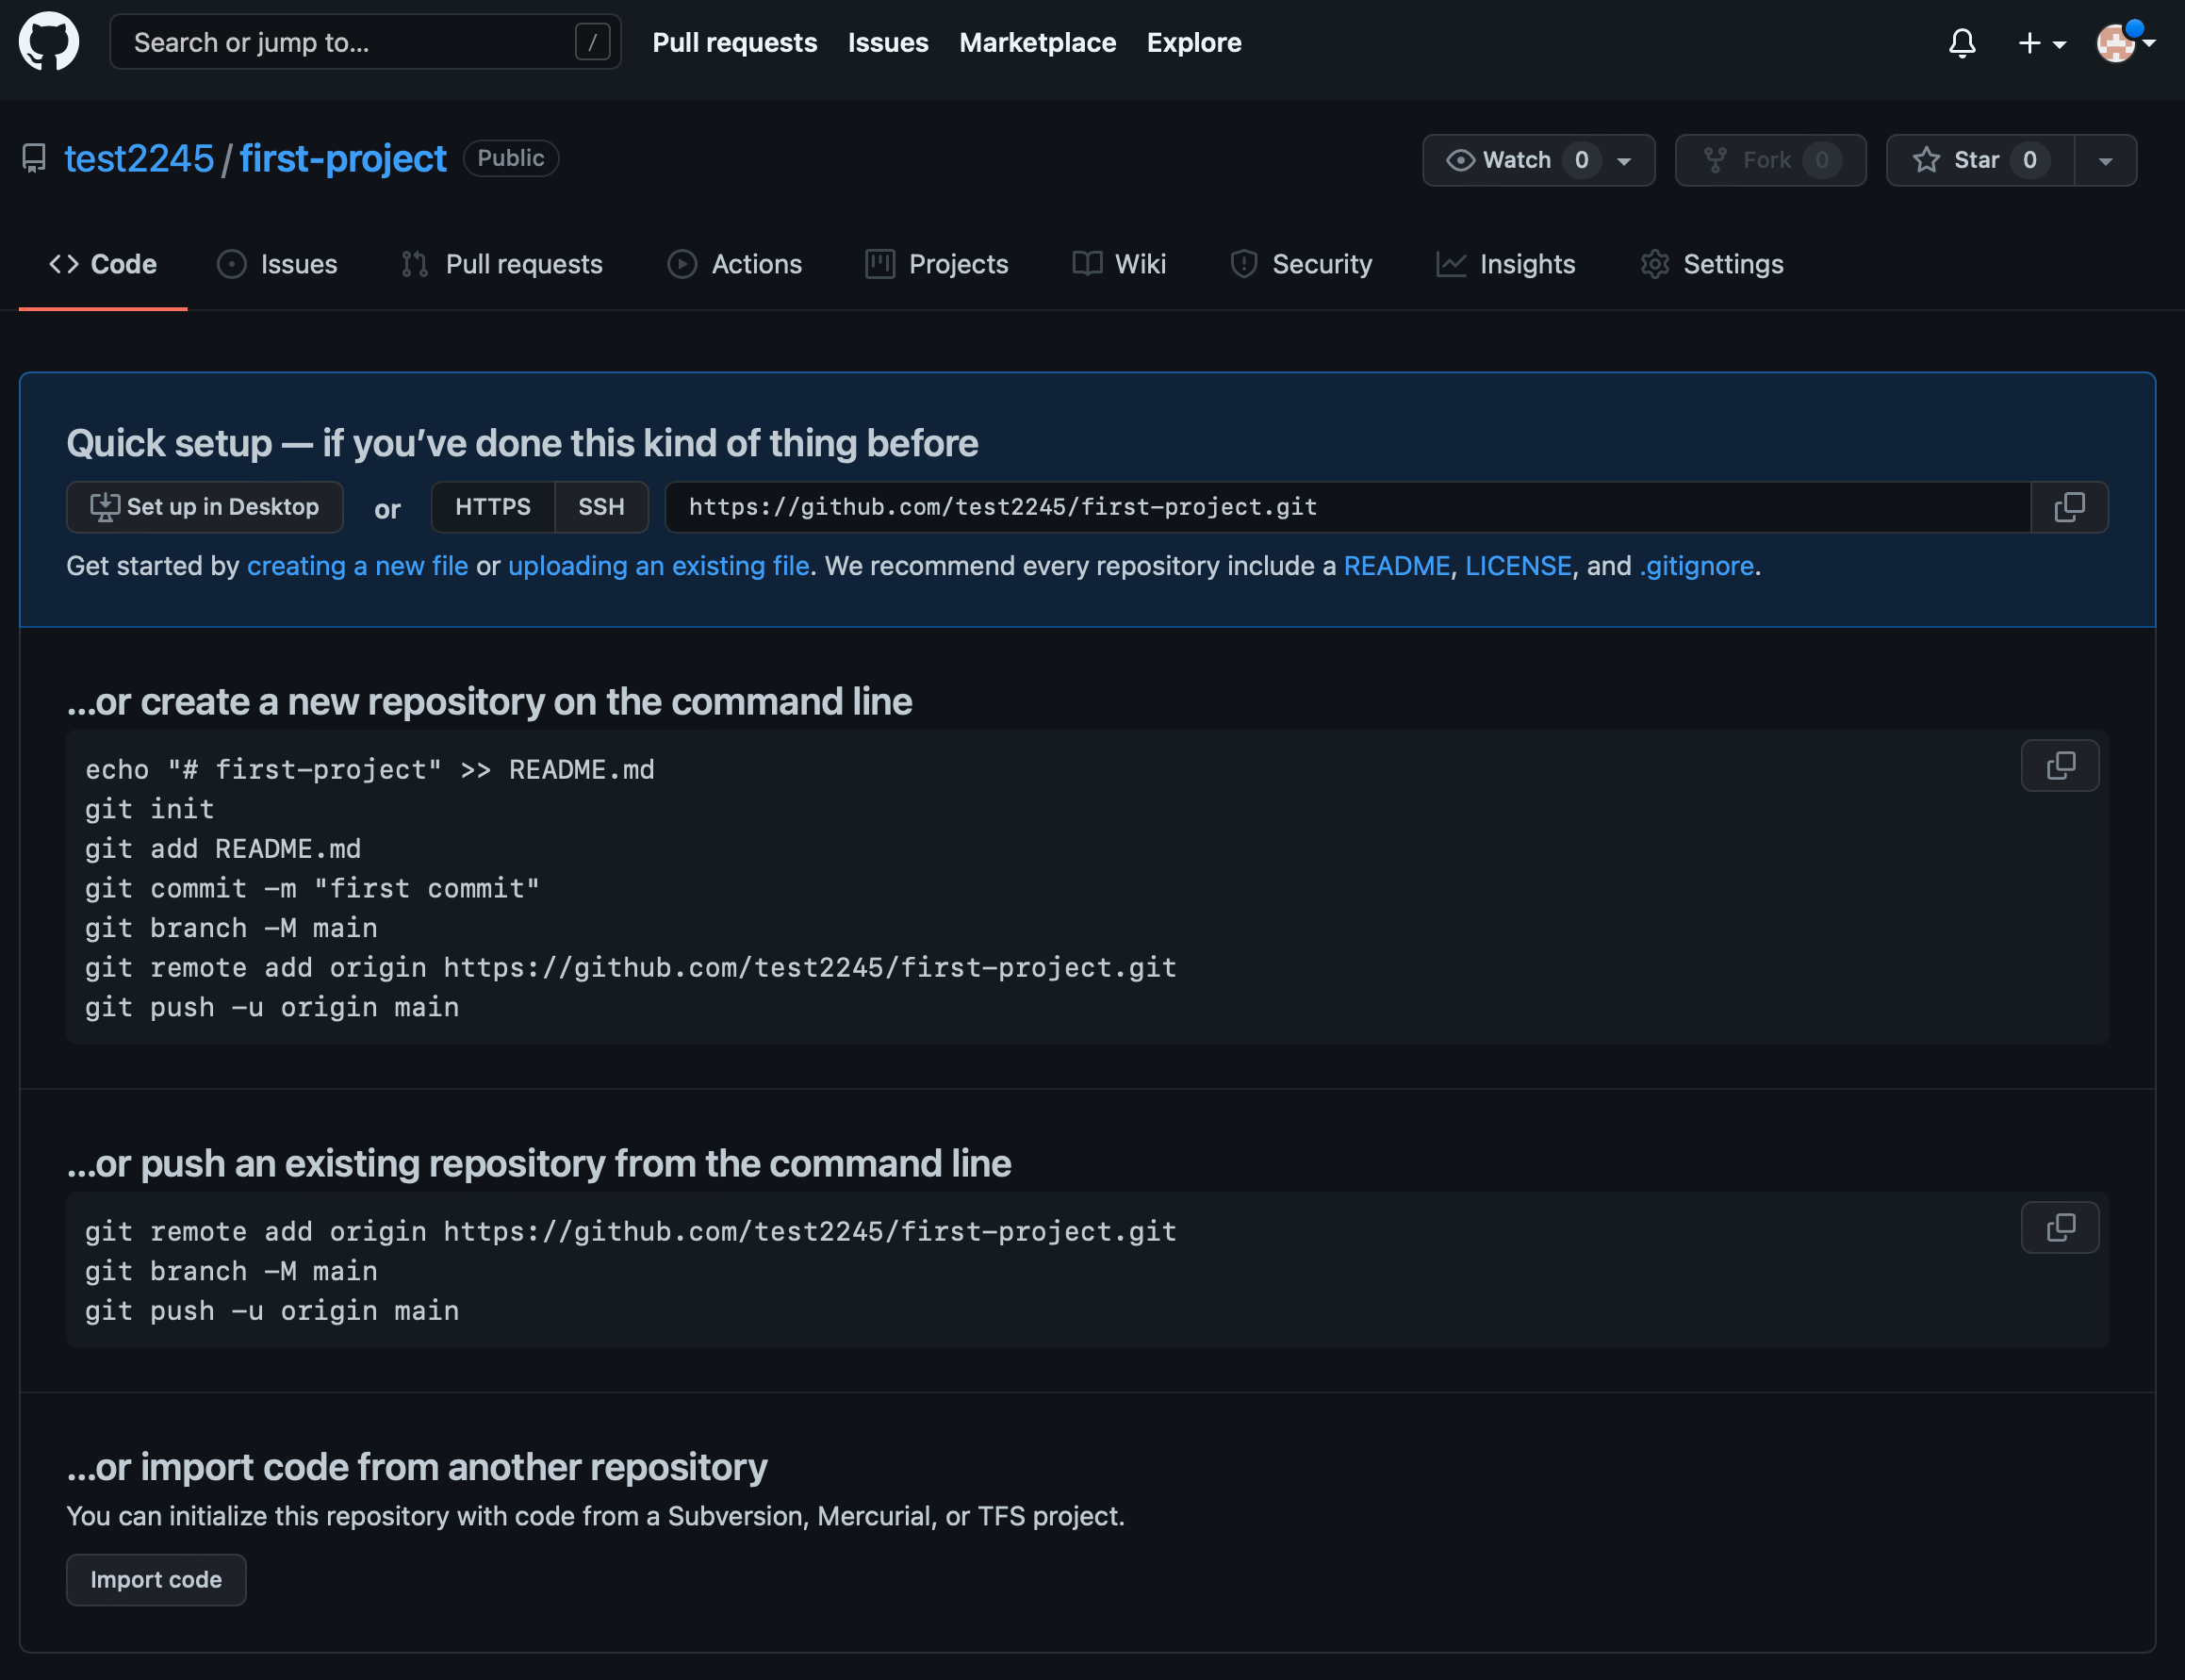
Cloning a Repository
This splash screen lists out some of the basic command line commands to create repositories and push changes. At the top, we see options to “create a new file” or “upload an existing file” but instead of using these options, we are going to use GitHub desktop to add files.
Open GitHub Desktop and sign in with your new account. Then we want to add a new repository by cloning it. We clone repositories when they exist on GitHub.com but not on our local machine. Creating new repositories allows us to create a repository on out local machine and push it to GitHub.com. Finally, we add an existing repository when the repository exists on GitHub.com and our local machine but has yet to be added to the GitHib Desktop application.
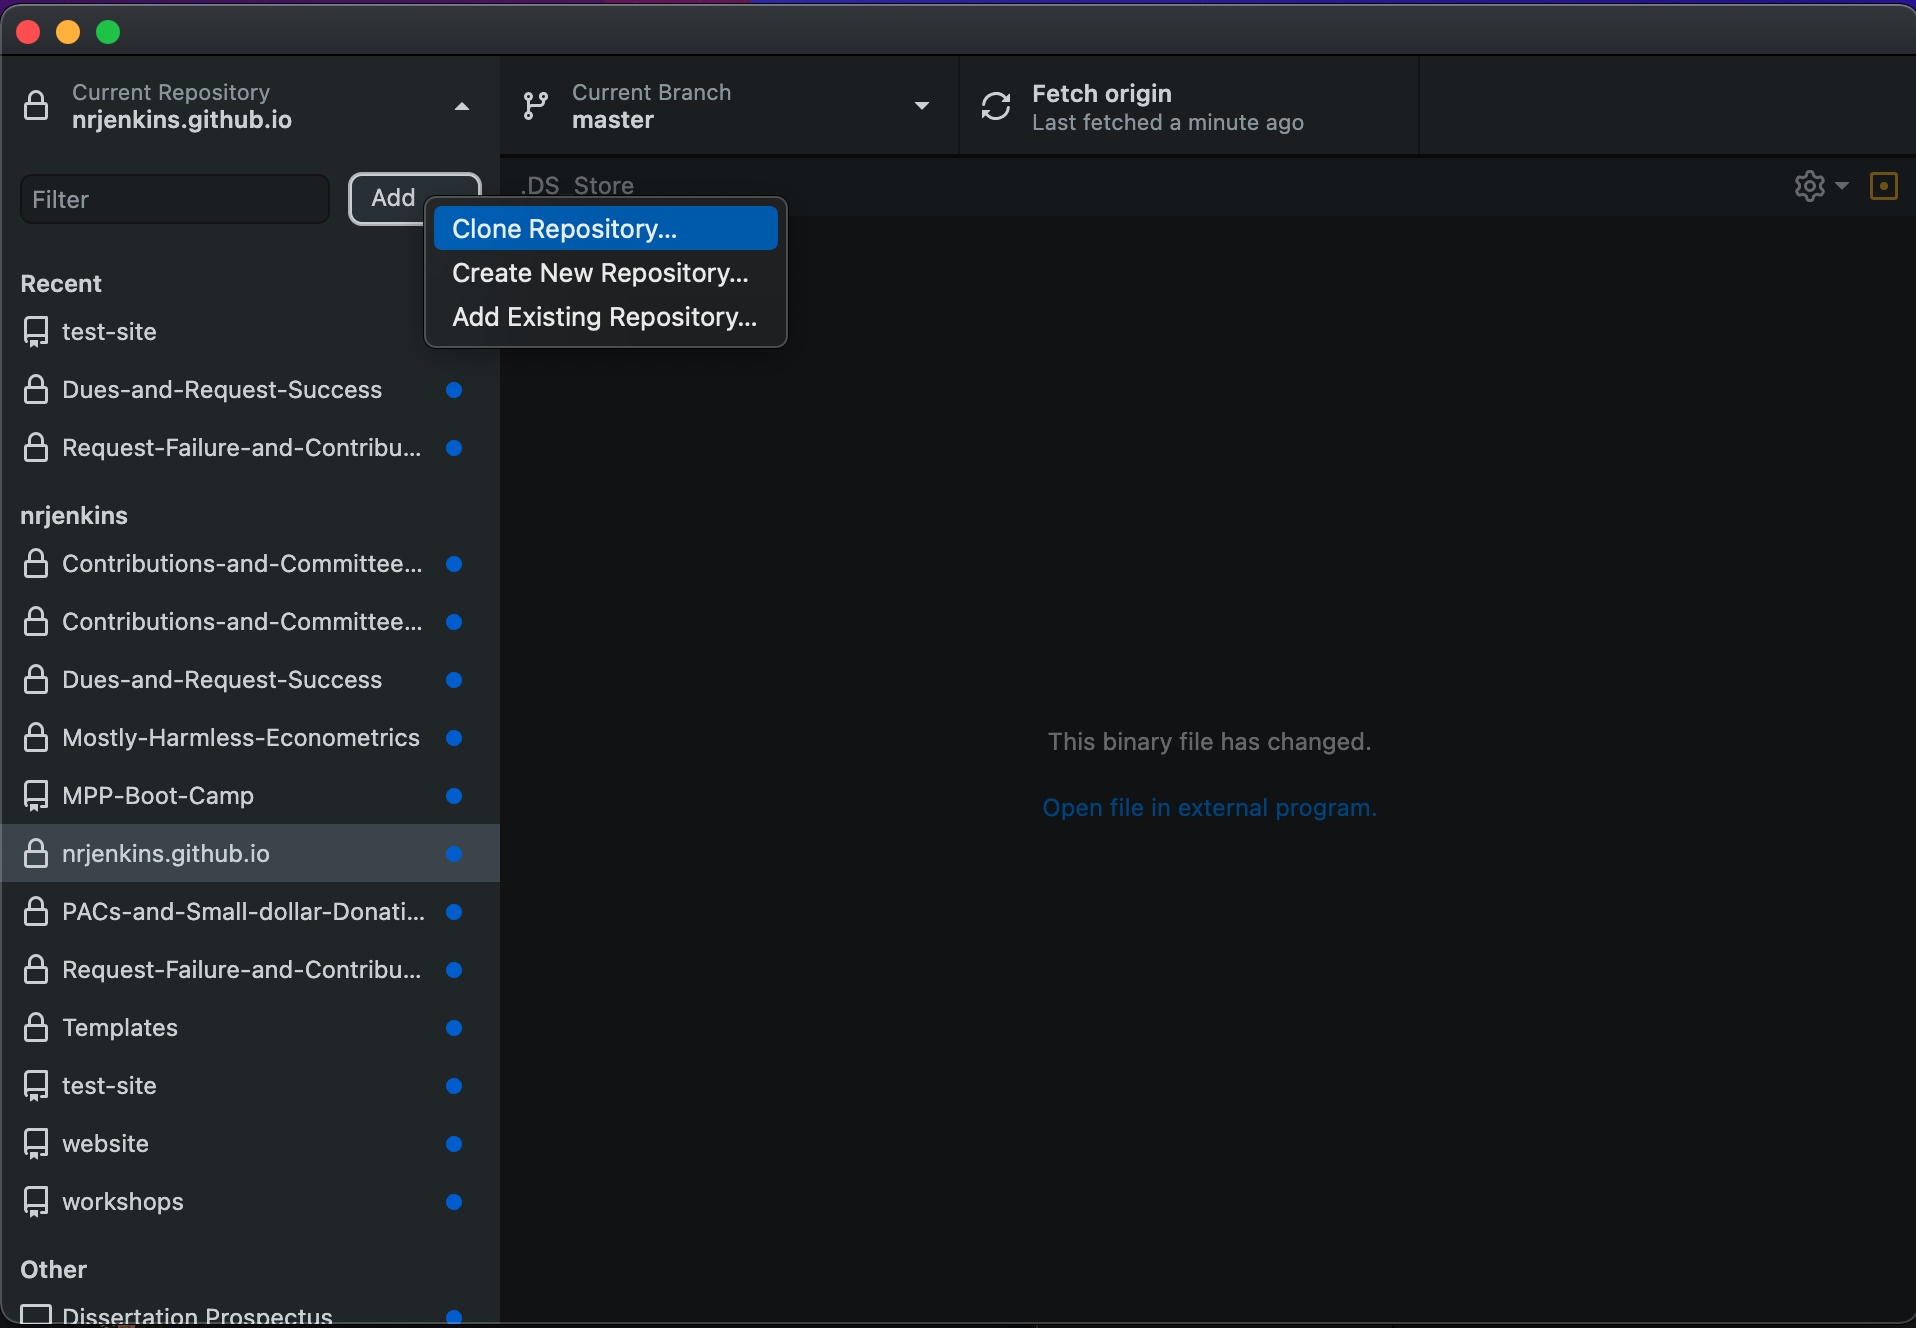
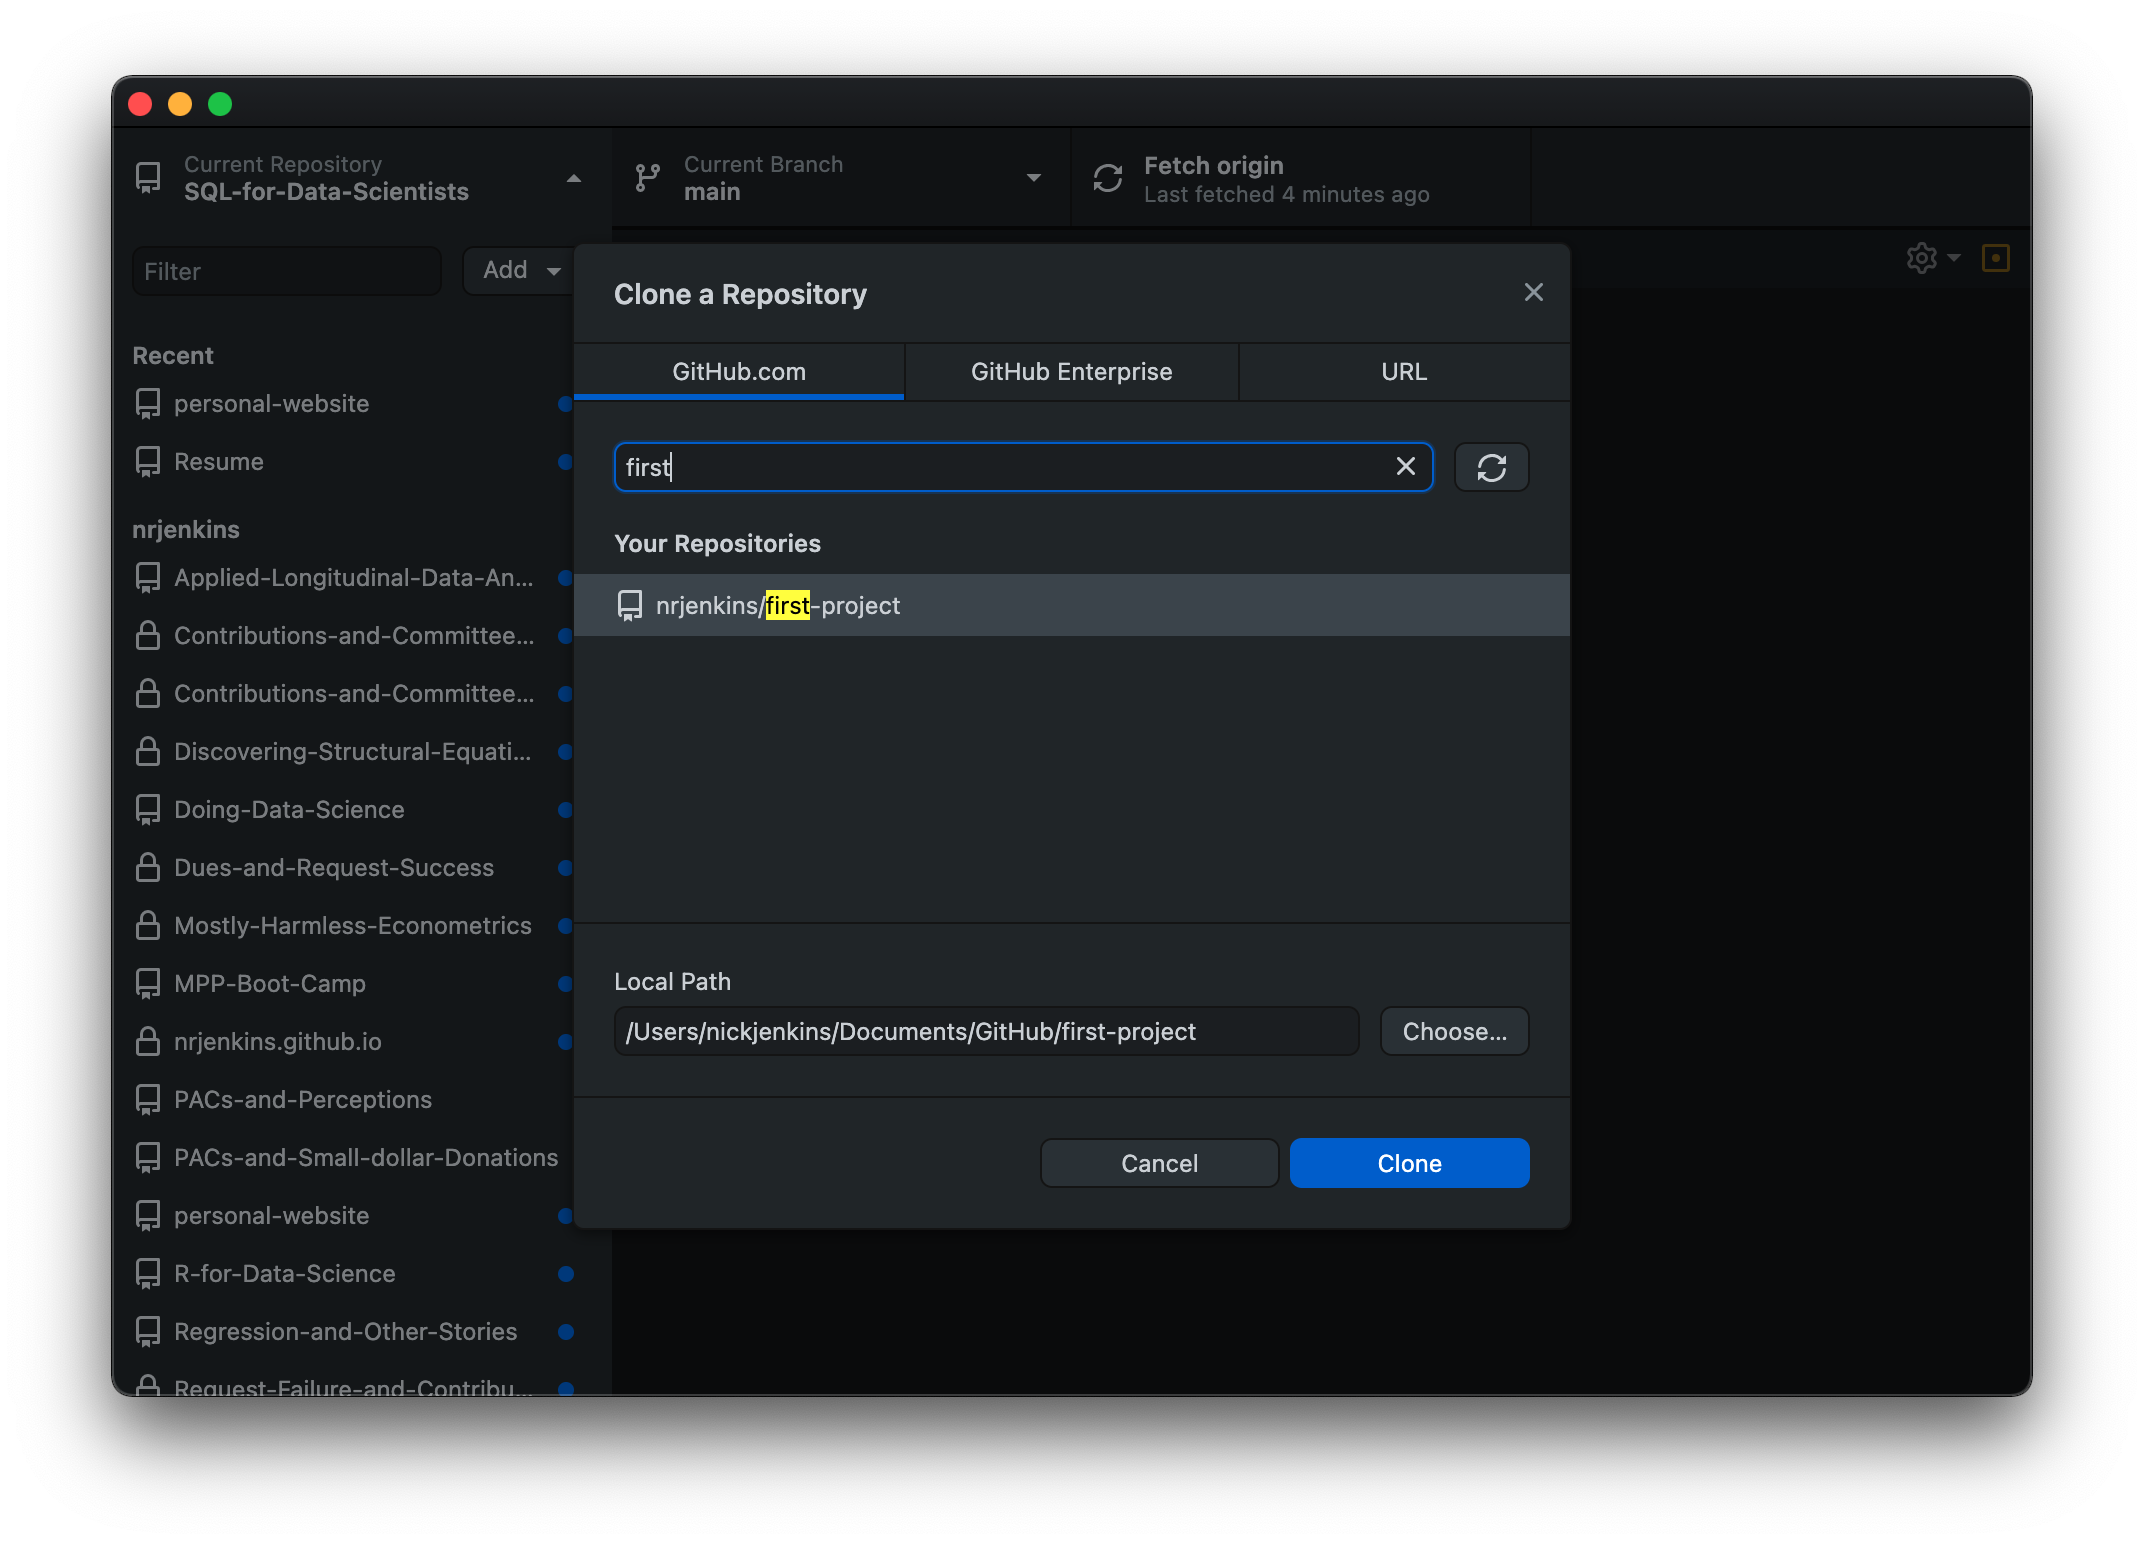
After you select “Clone Repository” select “first-repository”, where you want it to be saved to on your local machine, then click “Clone.”
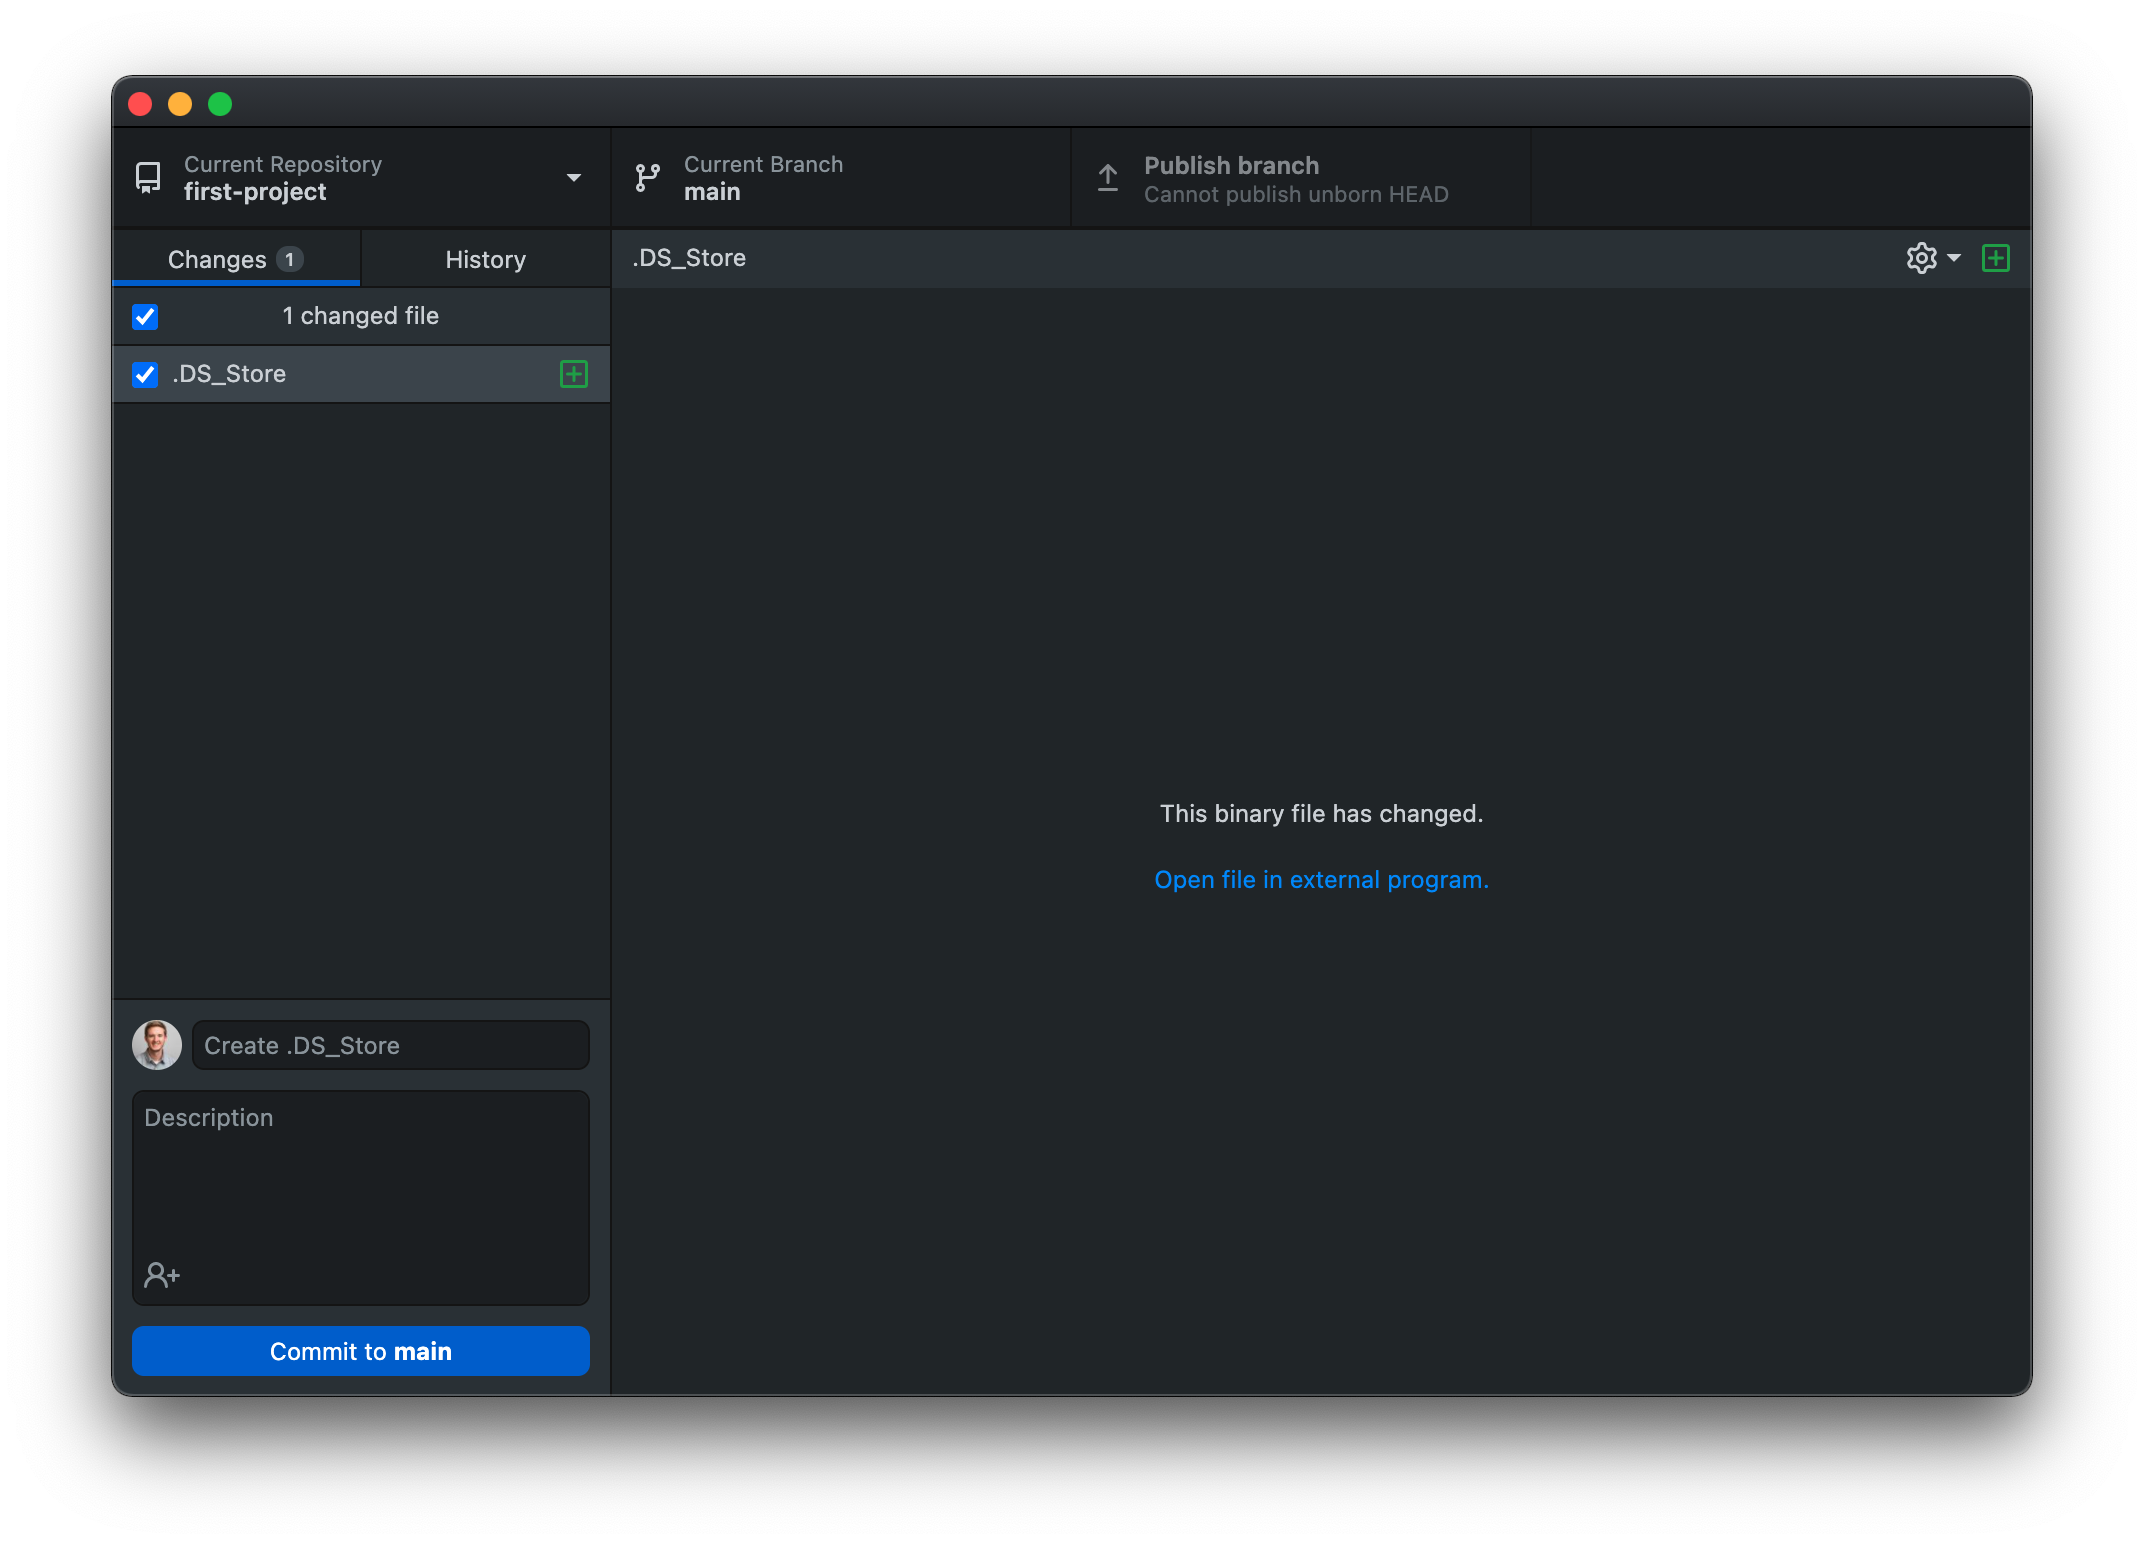
After you clone the repository to your machine, GitHub Desktop should look something like this:
Adding Files to Your Repository
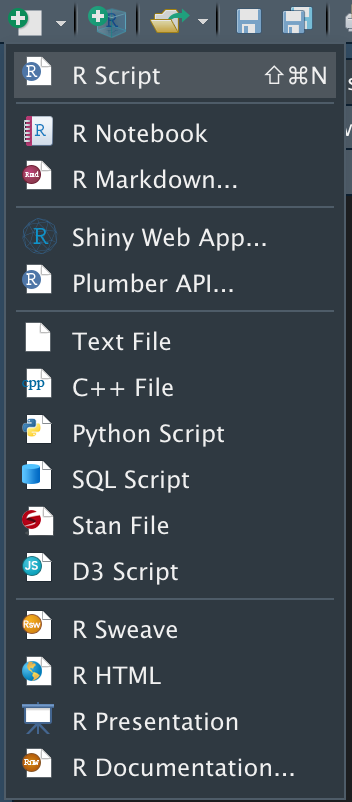
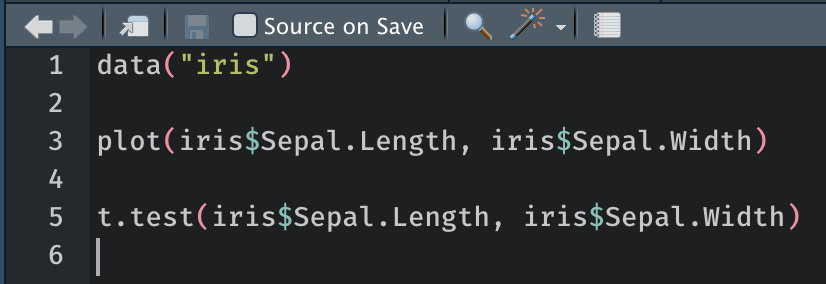
Now let’s start adding some files and making some changes! Let’s create a really simple R script as our first file…
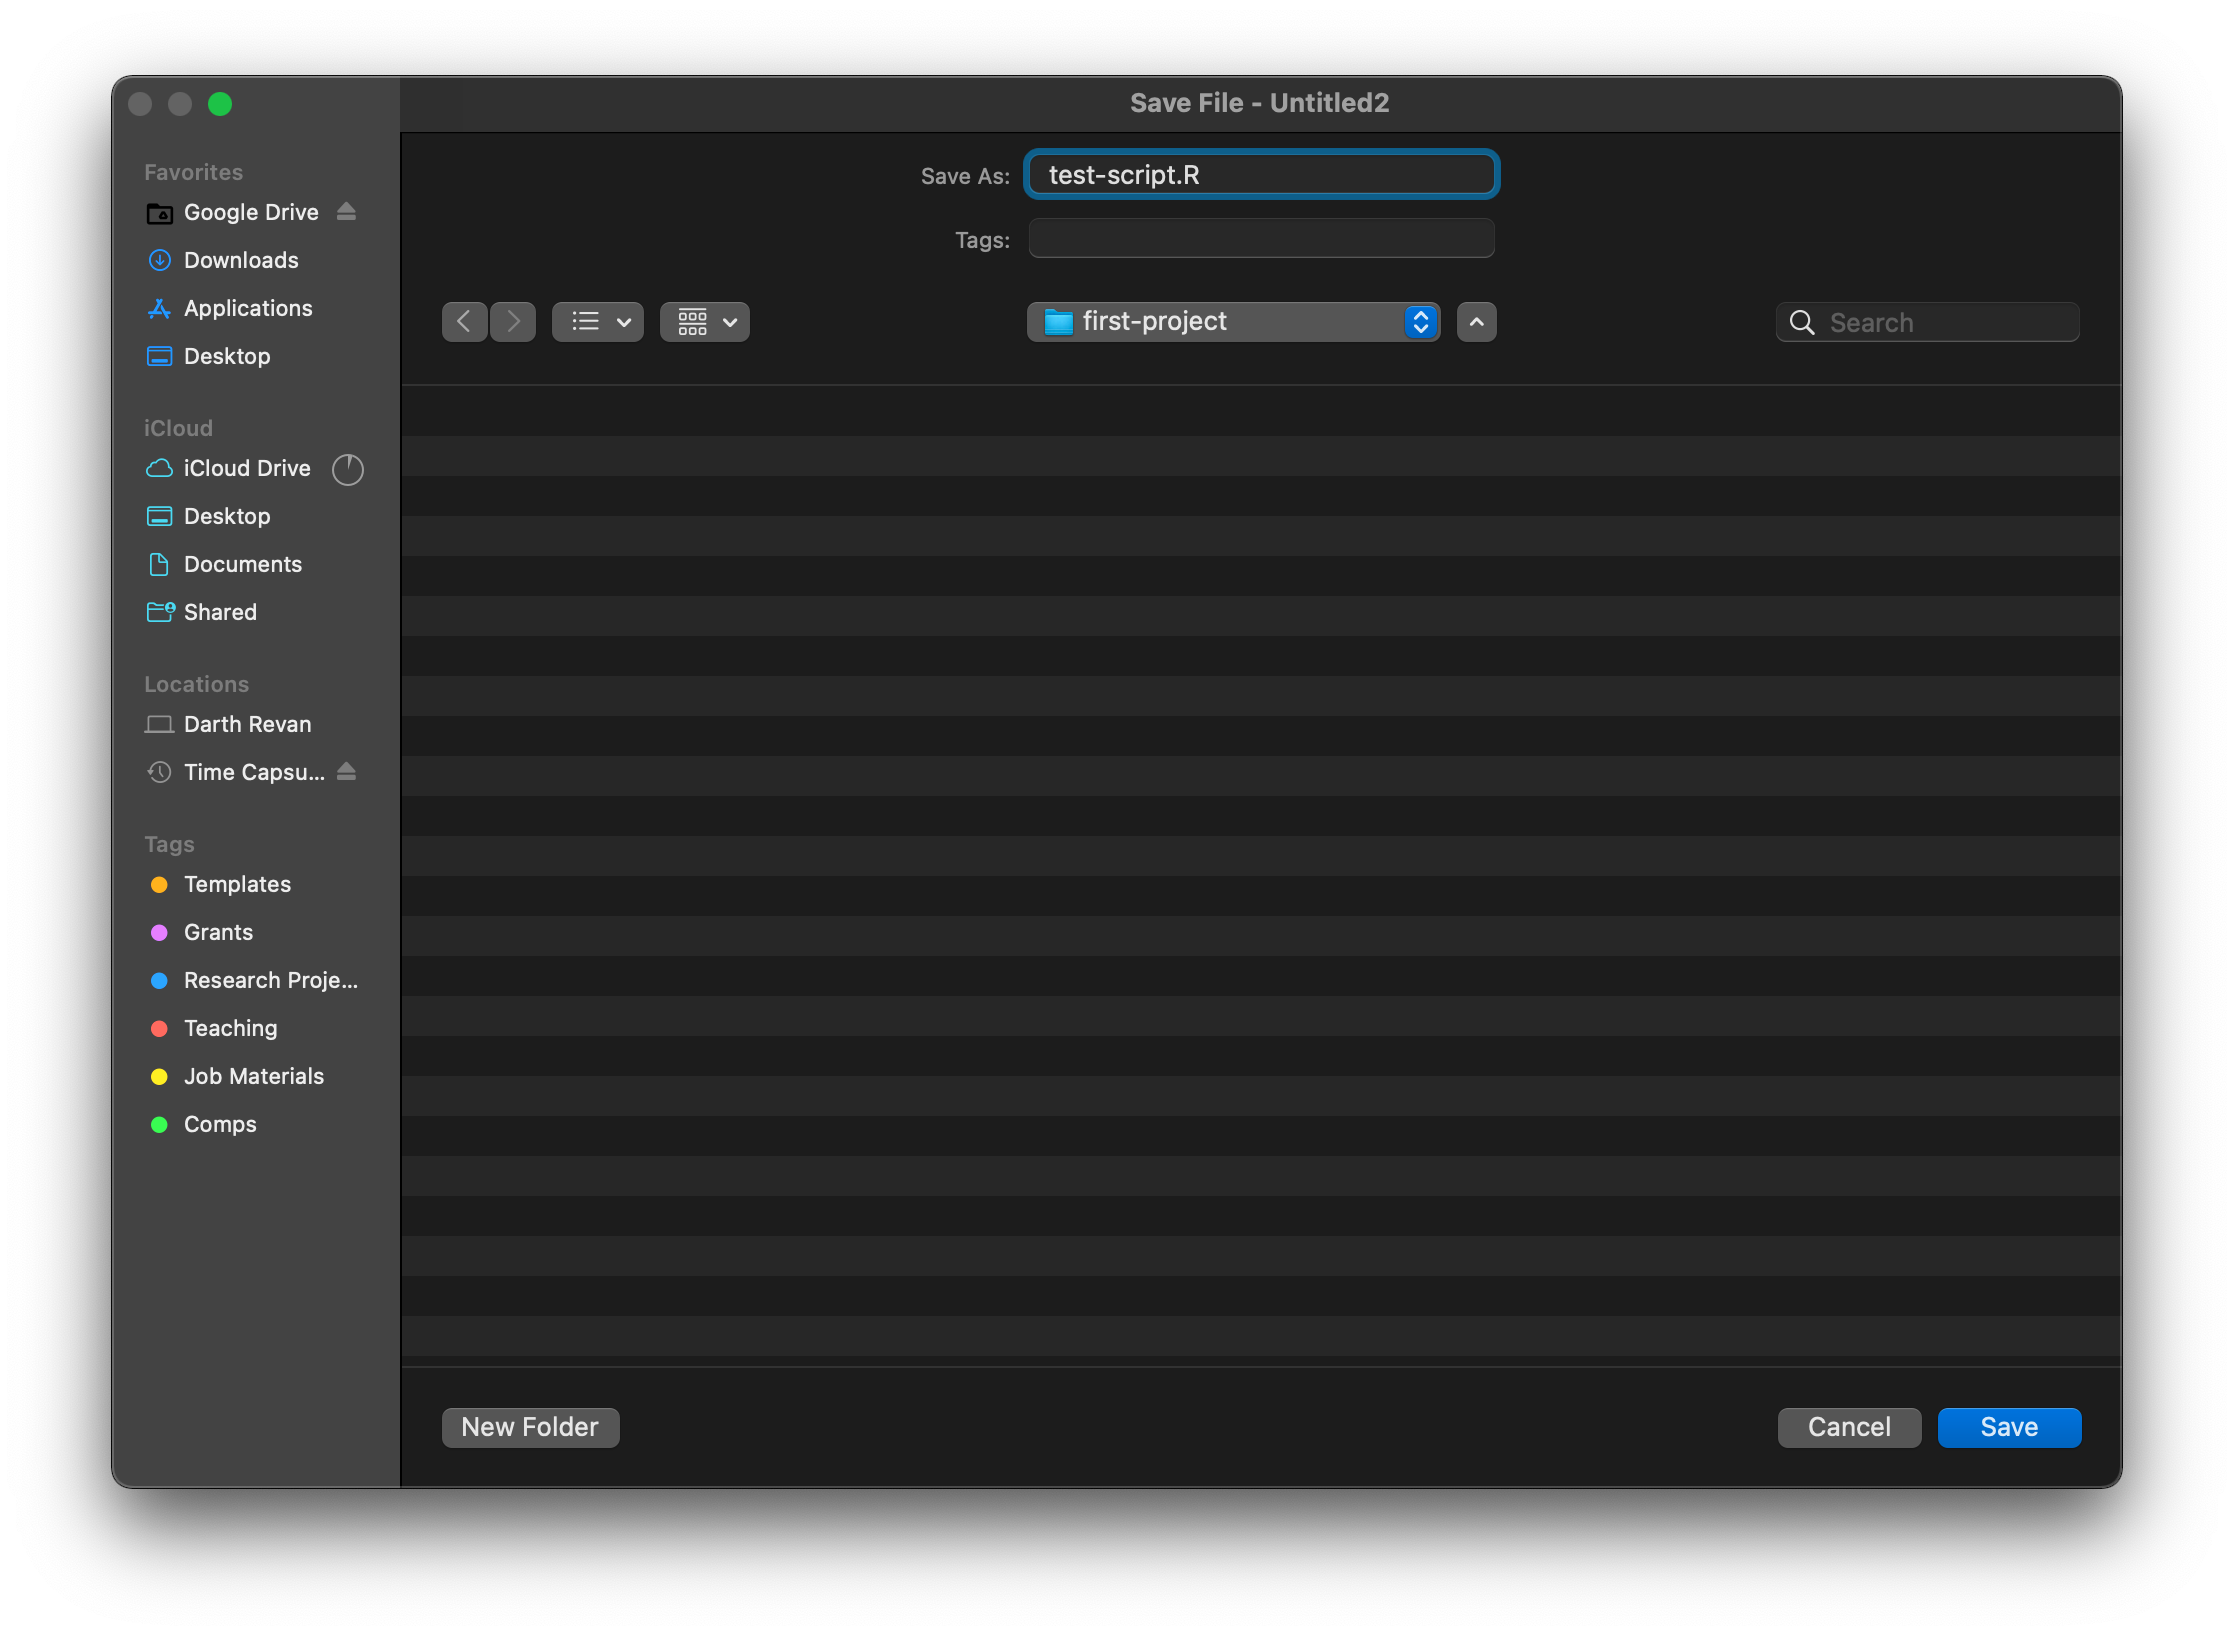
… and save it to our repository’s folder. Before you save it though, you will need to run this code in your R console:
usethis::git_vaccinate()This will tell Git to ignore some of the files that R creates that we don’t need Git to care about. It will make your life easier.
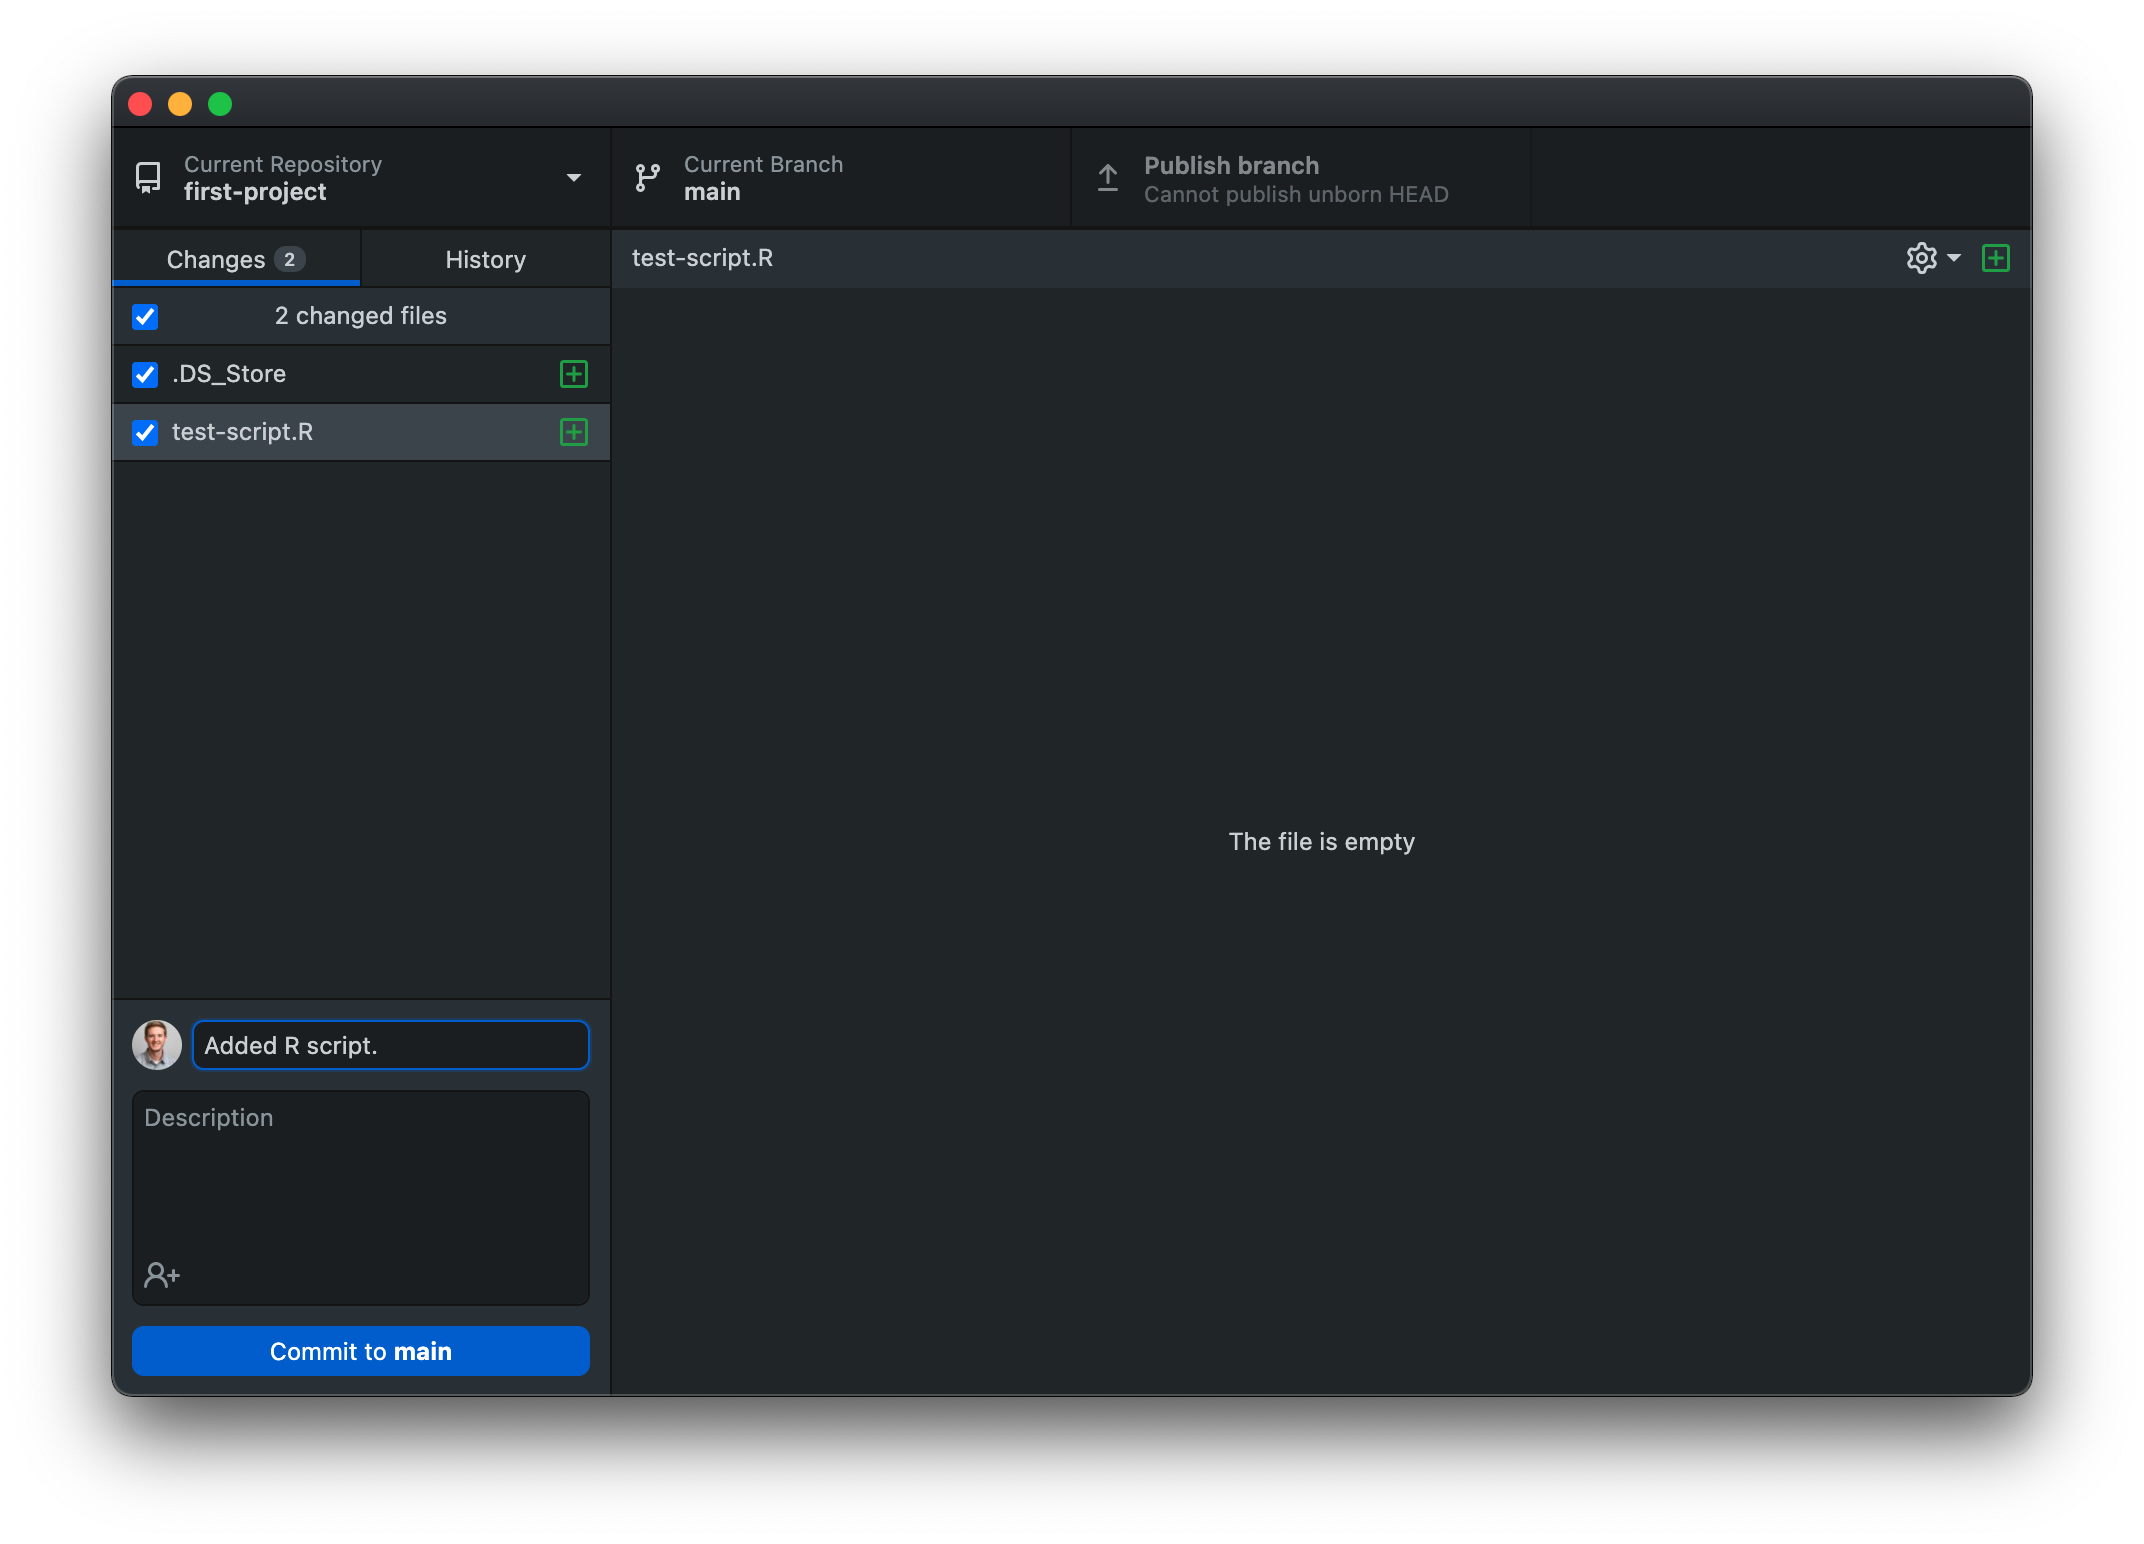
Now that we added a new file to the repository, we need to commit the changes (save them with Git) and push them to the repository (update the repository with our new file). We can do all of that with GitHub Desktop. Go back to GitHub desktop and your new fill will be listed on the left hand side. Type in a summary of what changes we made in the box next to your profile picture. When you’re done, click “Commit to main”.
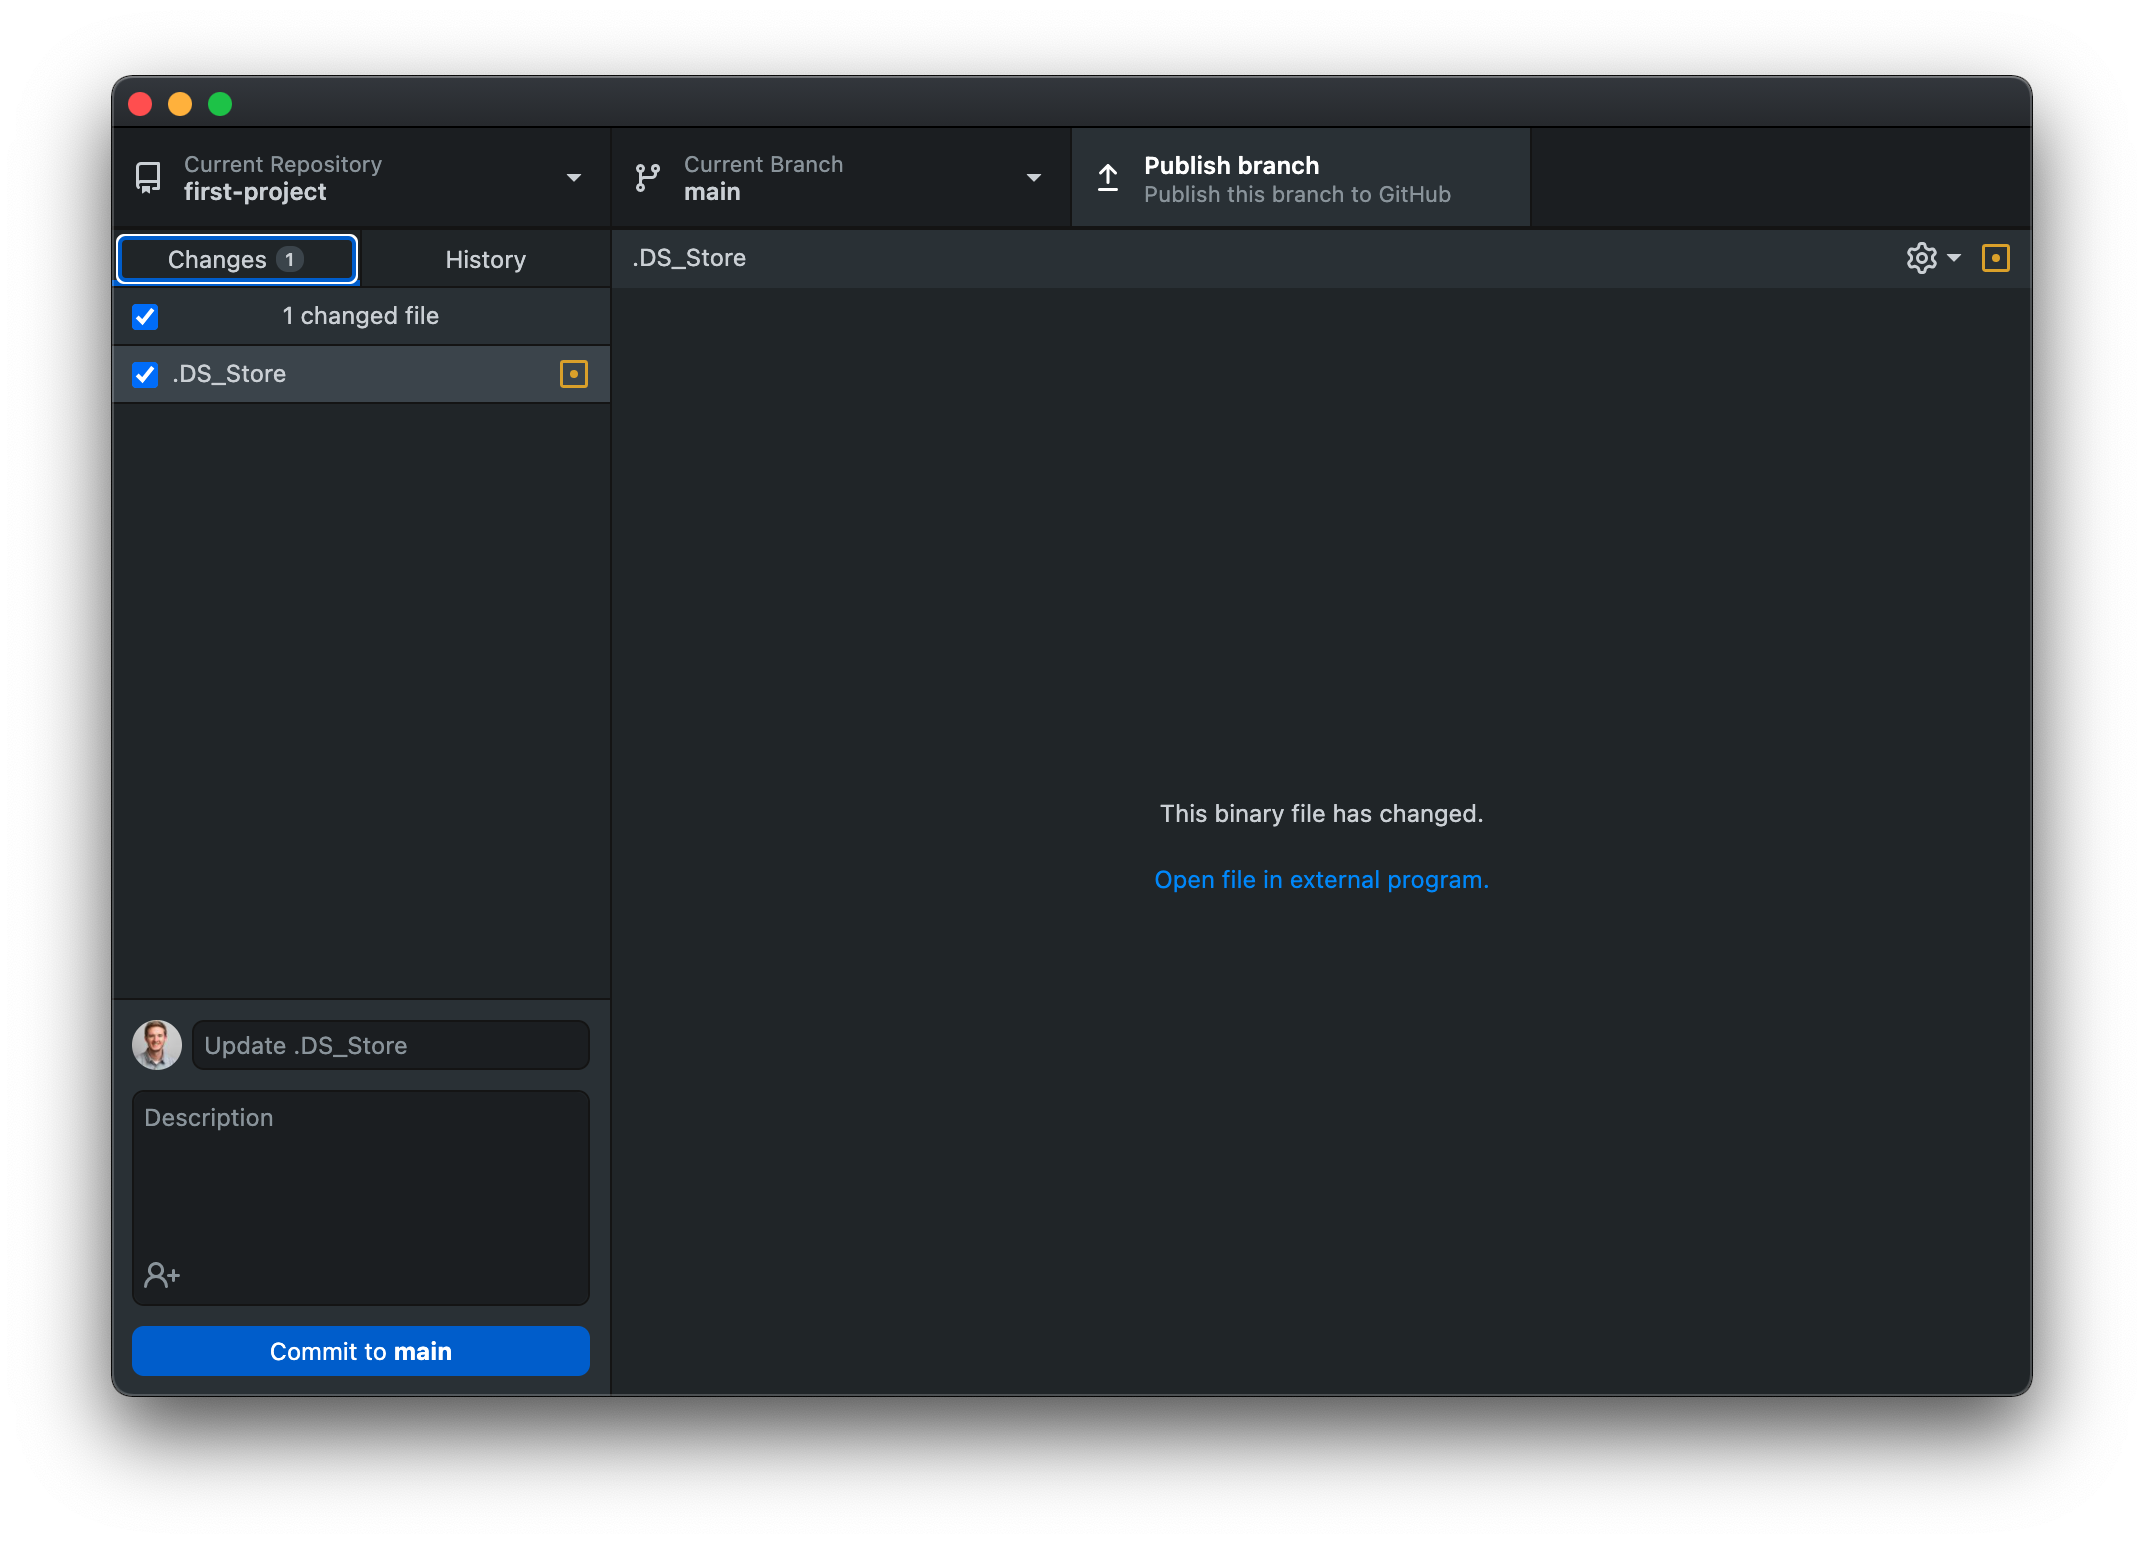
After you commit the changes, the last step is to push them to the GitHub (or publish them if it is the very first commit).
Committing and Pushing File Changes
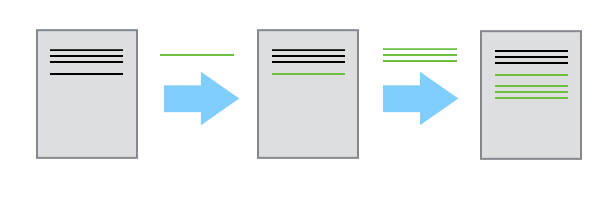
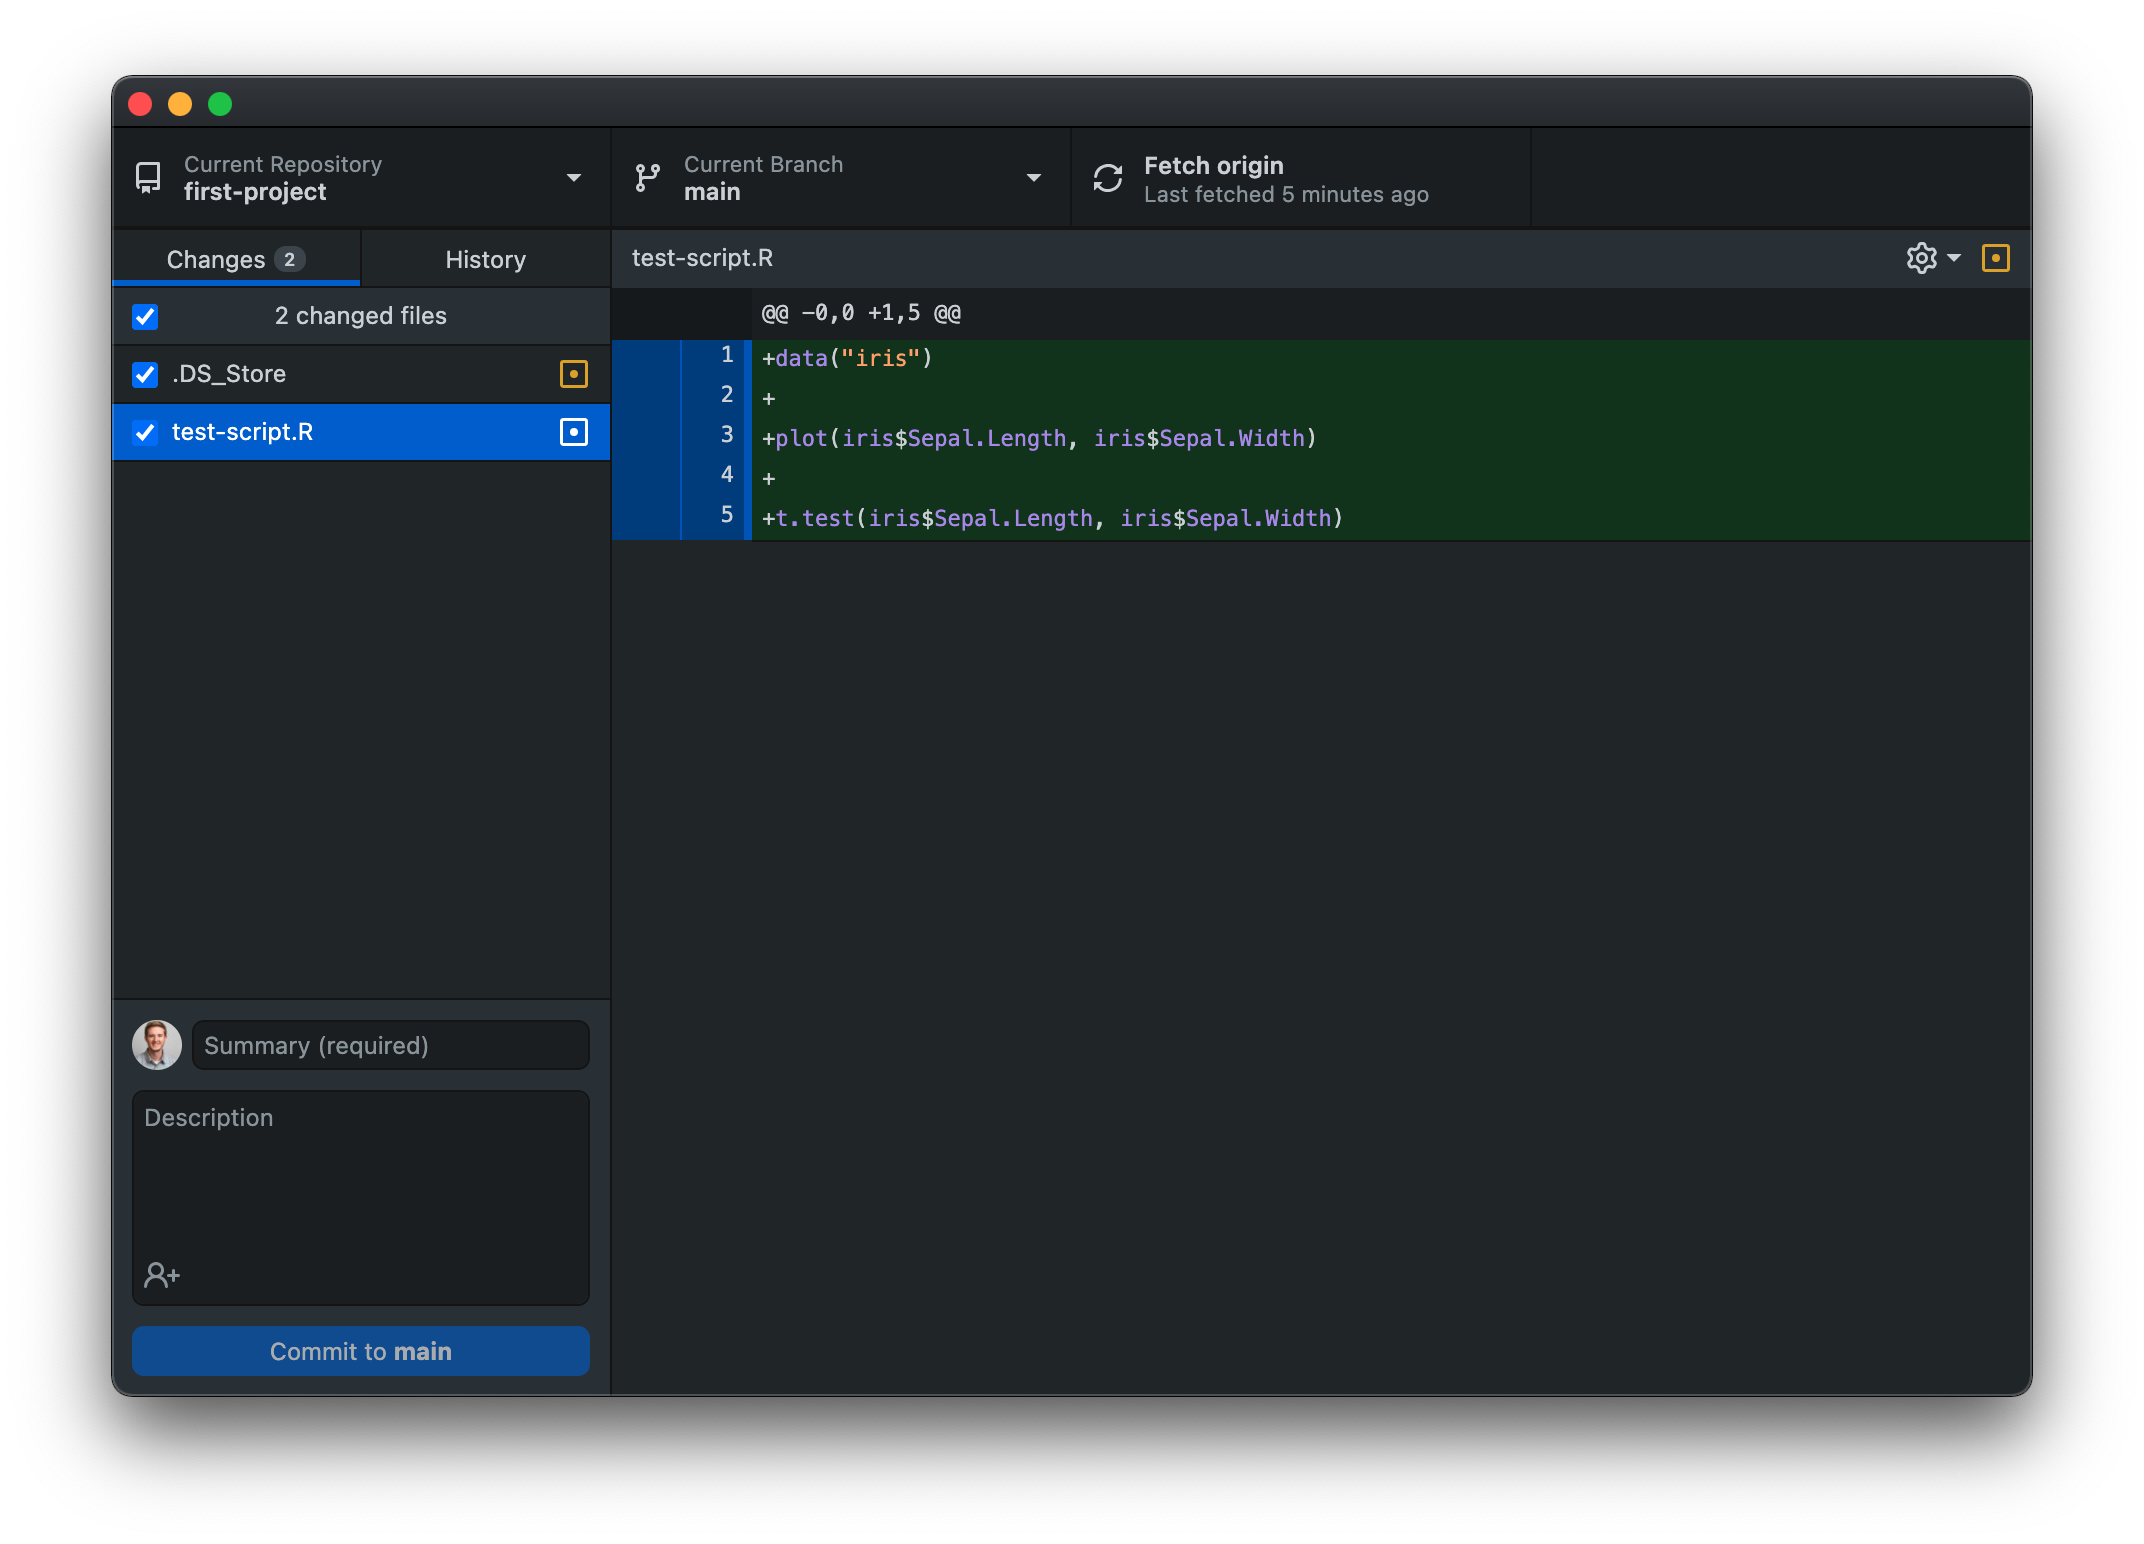
Awesome! Now if you check the repository on GitHub.com, you will see your new R file. Now let’s add some code to the R script.
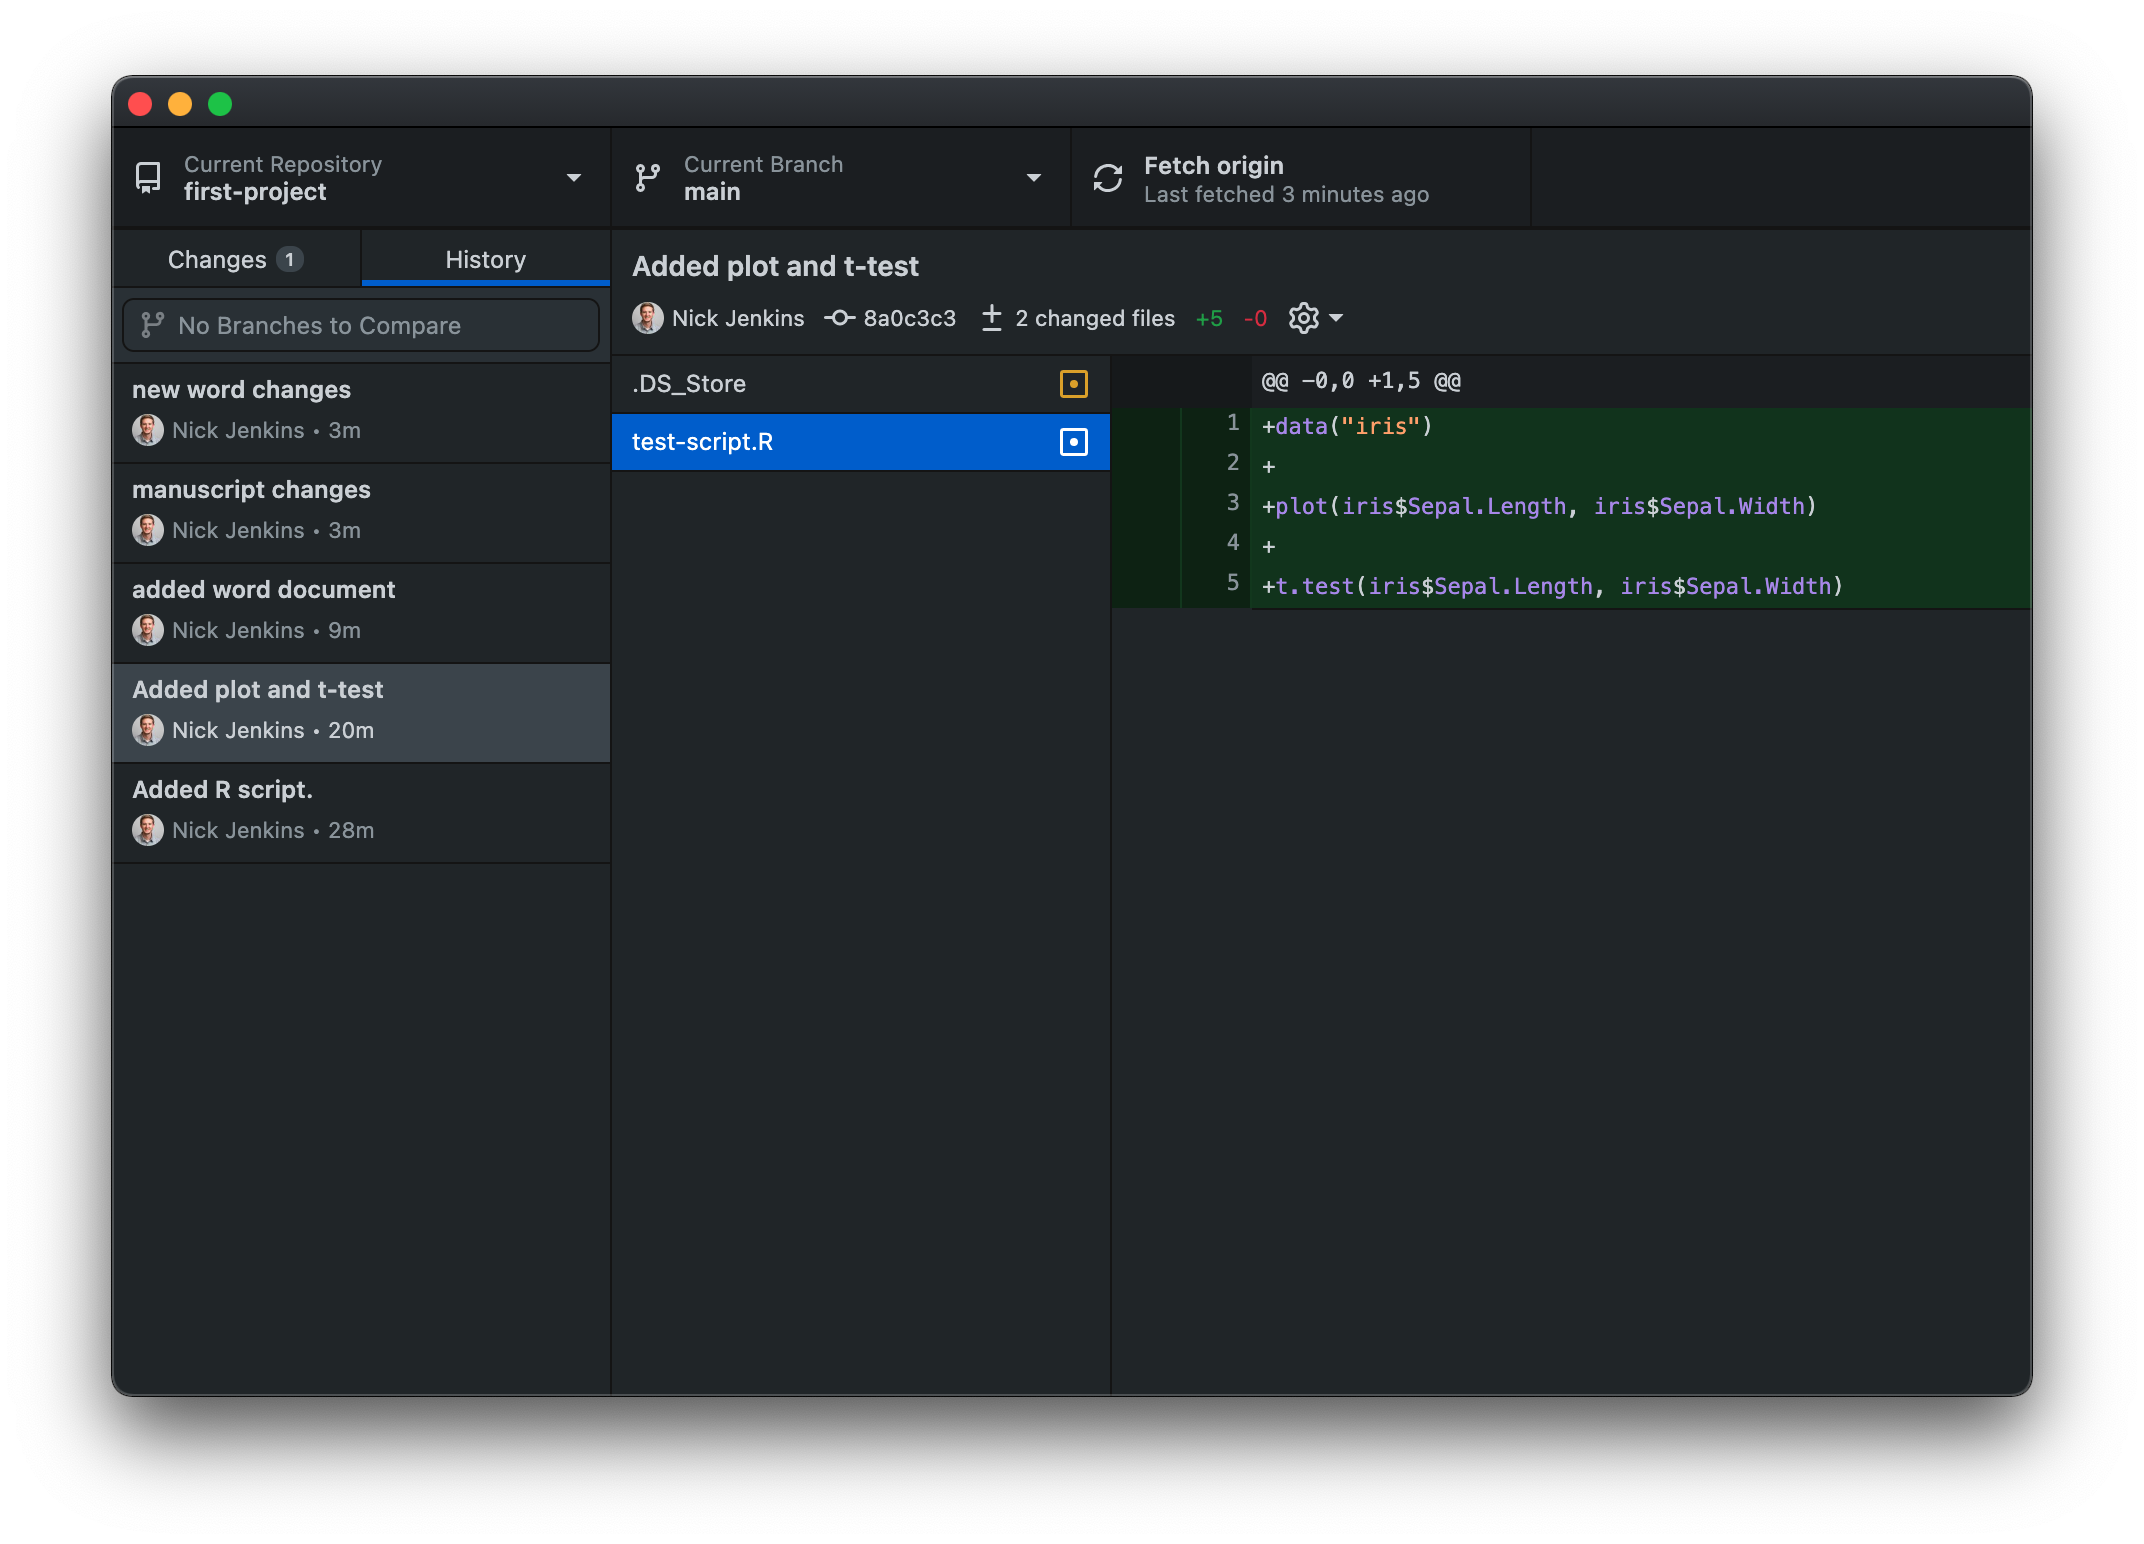
Once you’re done with the code, save the file and head back to GitHub Desktop to commit and push the changes. This time you will see all of your changes highlighted in green. That shows what was added to the file.
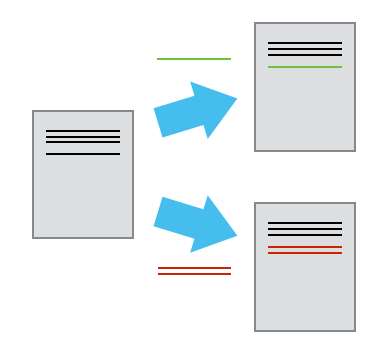
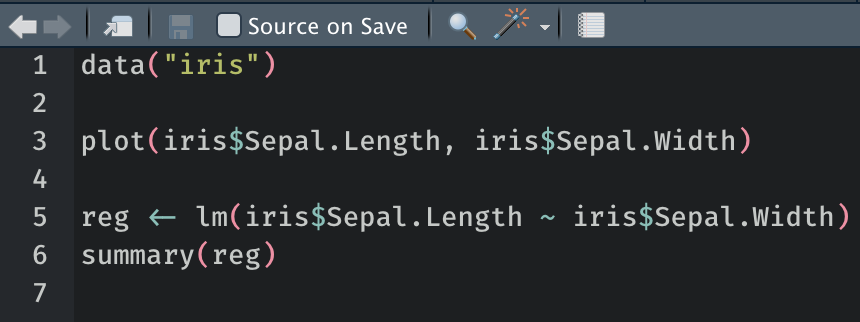
After you commit the changes and push them, let’s go back to the R script and make another round of changes. This time, let’s delete the t-test and add a regression.
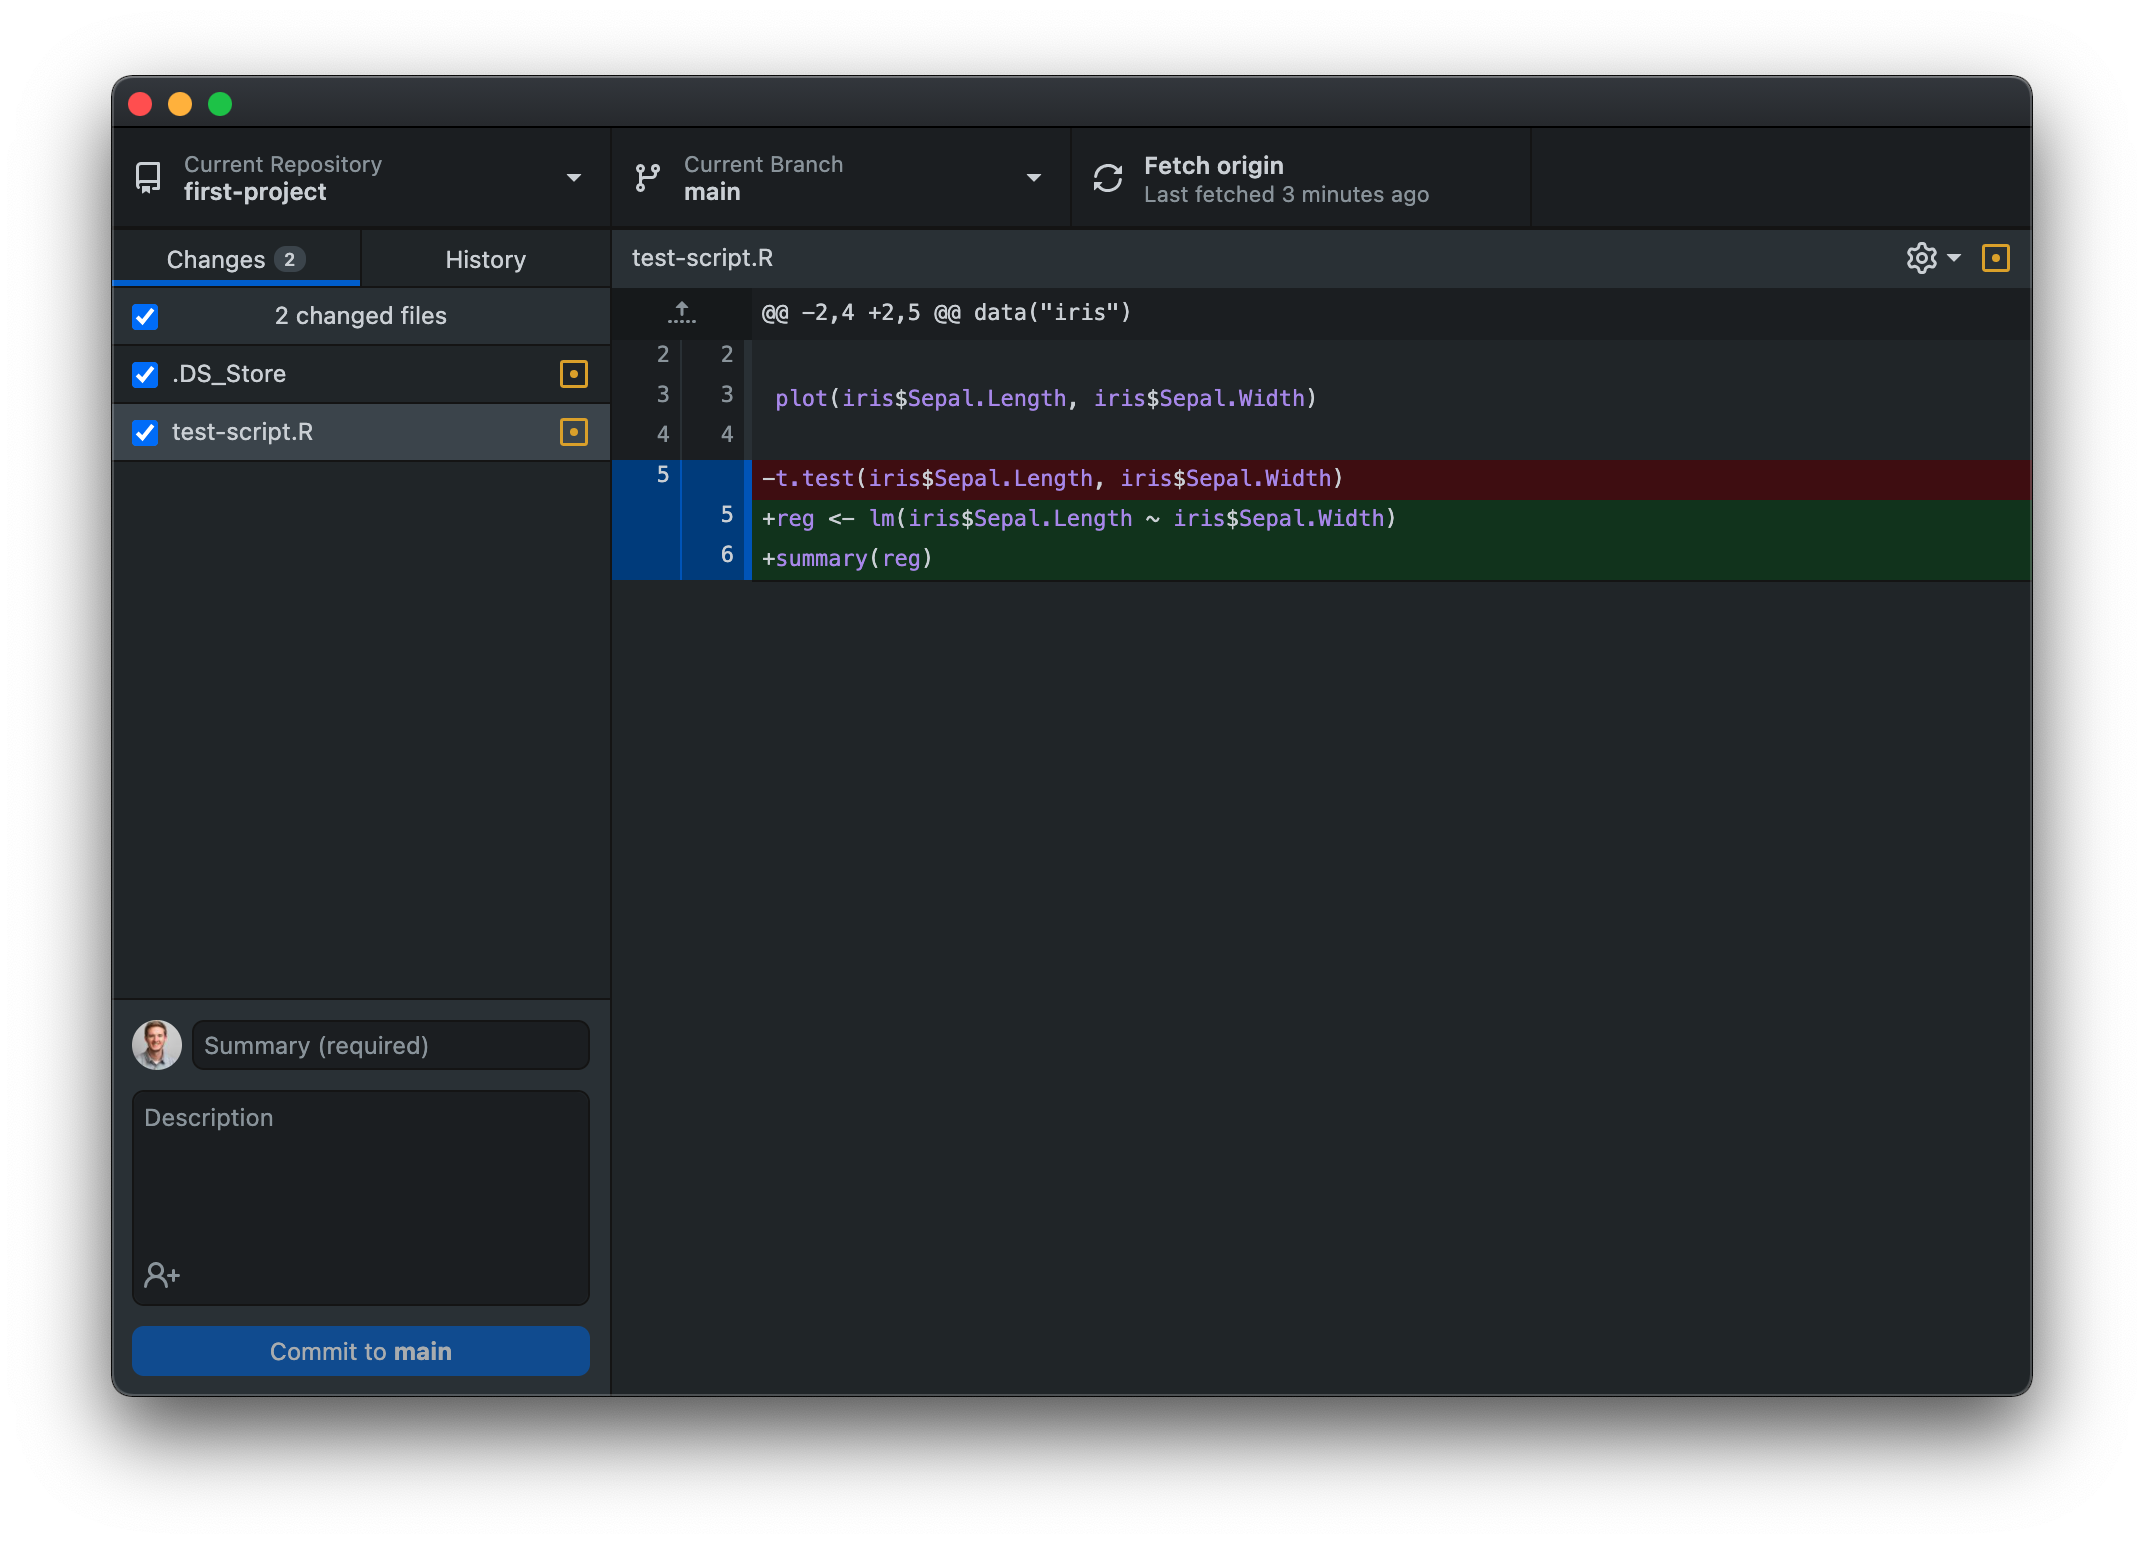
Now head back to GitHub Desktop. What do you see now when you select the “test-script.R”? All the additions are highlighted in green, like before, and the deletions are highlighted in red:
This functionality works for all file types. As an example of another file, let’s add a Word document to the repository. So, open Word and save a blank document to the repository folder.
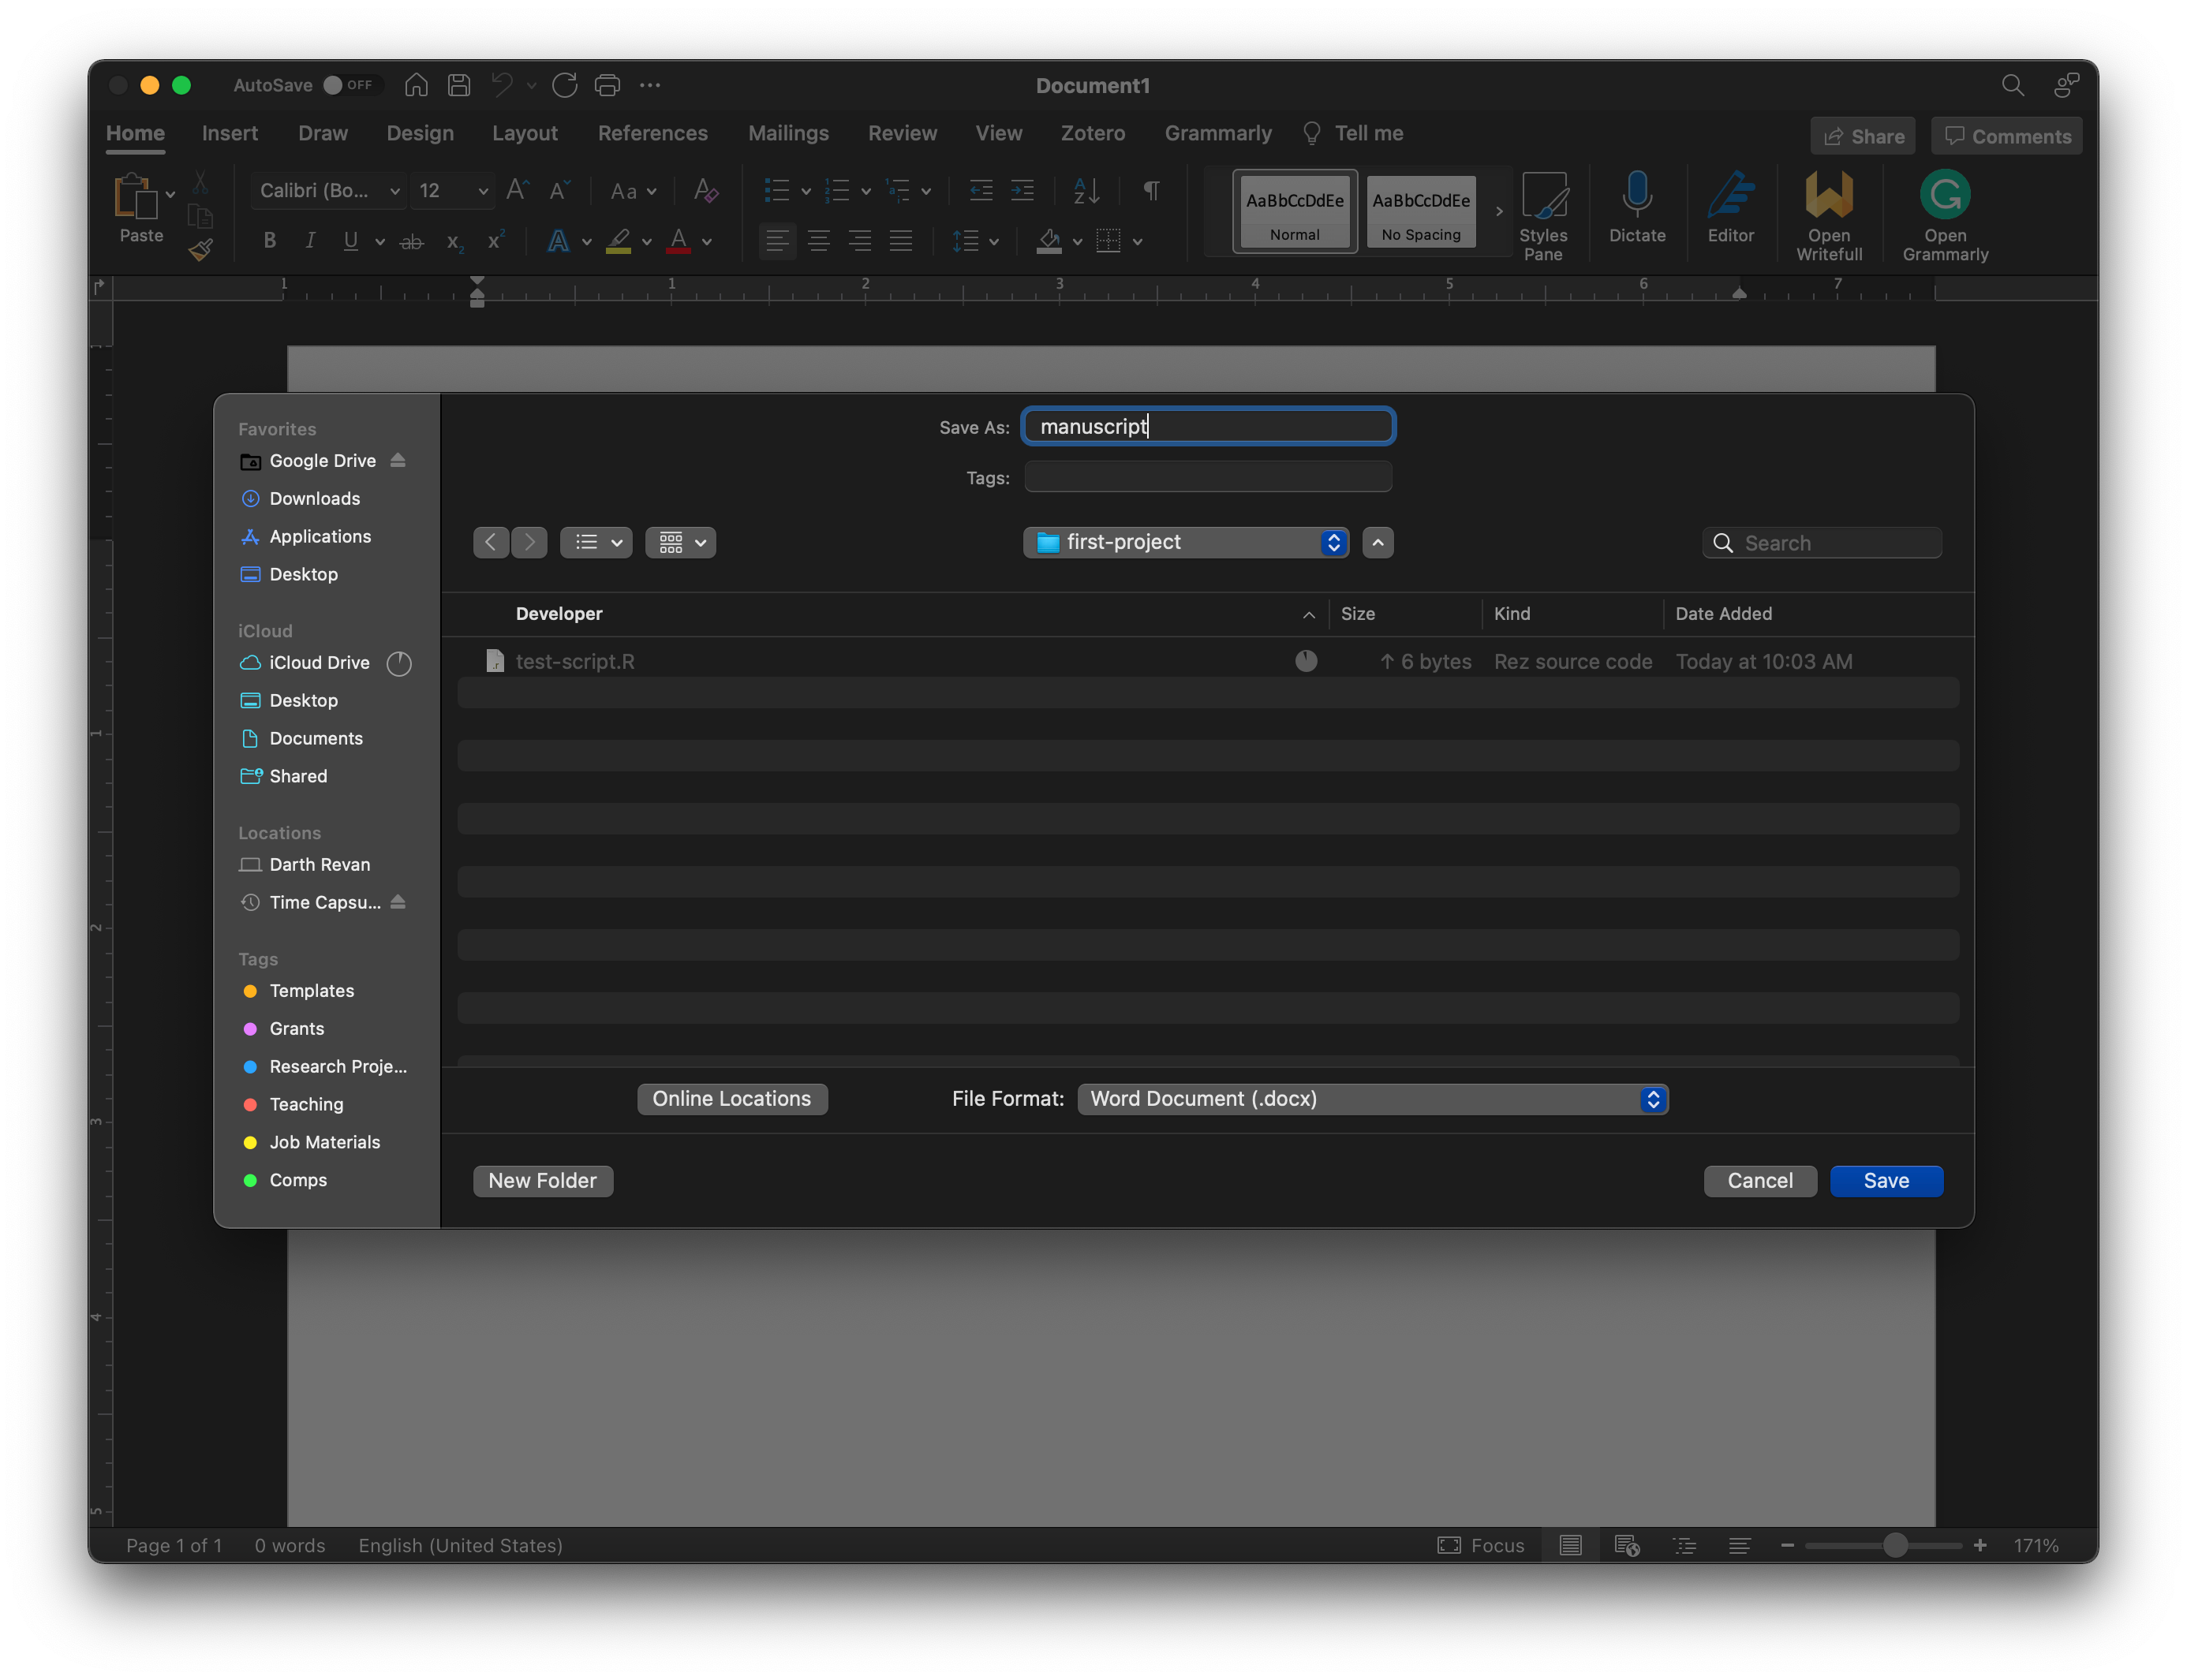
After you create the file, commit and push your changes. Now start writing in your Word doc. Save the document. Head to GitHub Desktop. Wait, where are the changes? GitHub can’t display them because Word uses a special file format .docx, but it will still keep track of your changes. Don’t believe me? Test it out.
Reverting to a Previous File Version
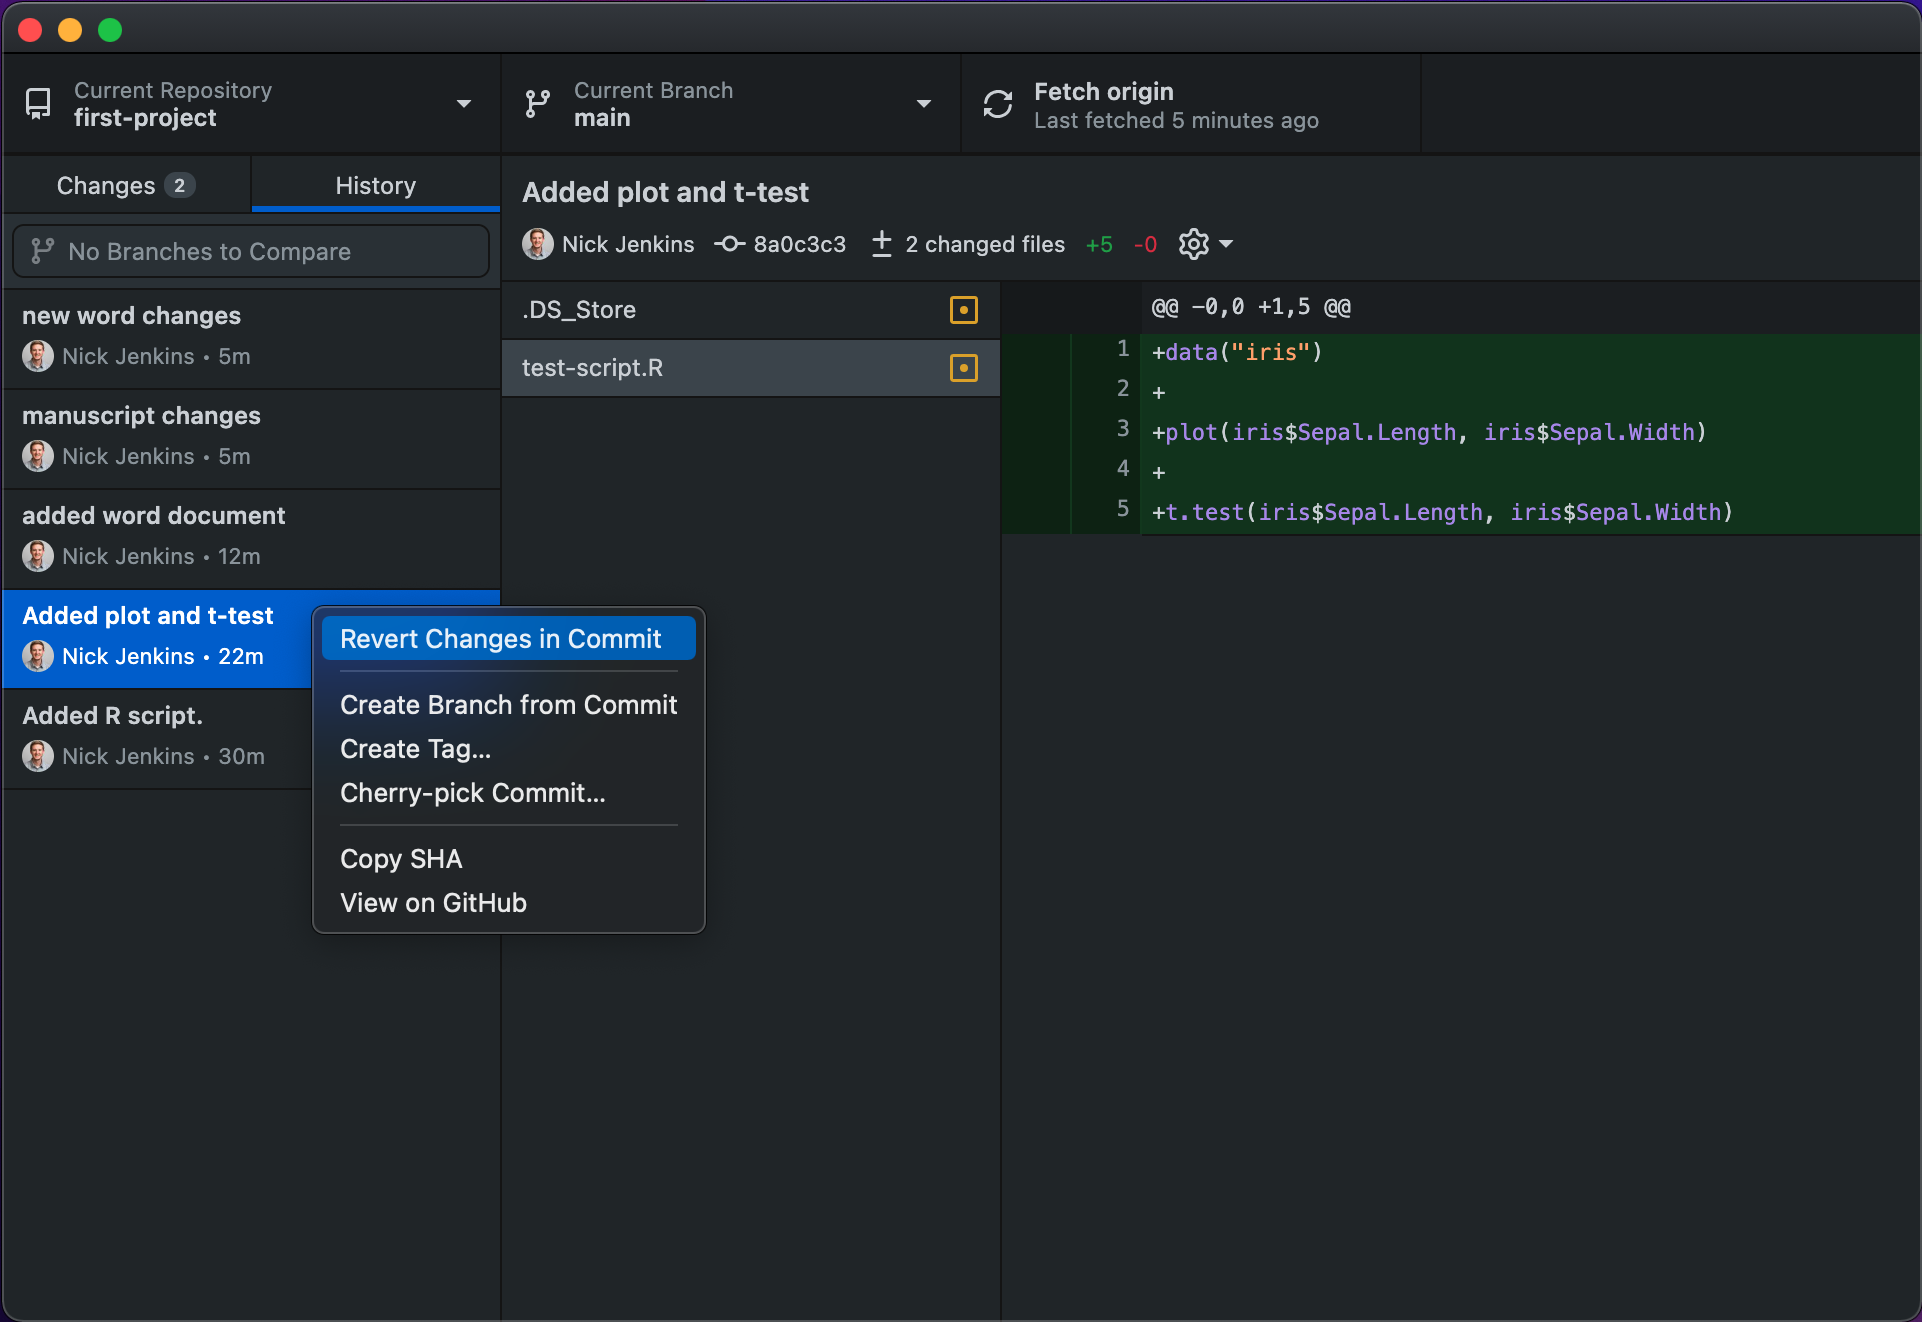
Now let’s pretend that you made a mistake adding that regression to your script. Shoot! You really do want to use that t-test instead. Well, GitHub has you covered. All we need to do is go into the history and revert the changes to the version we want. In GitHub Desktop, click on “History” and select the version you want to revert to. You can even see what changes you made by clicking on the file:
Once you have the version you want, right click and select “Revert Changes in Commit.”
After click that, you see that you have changes to push:
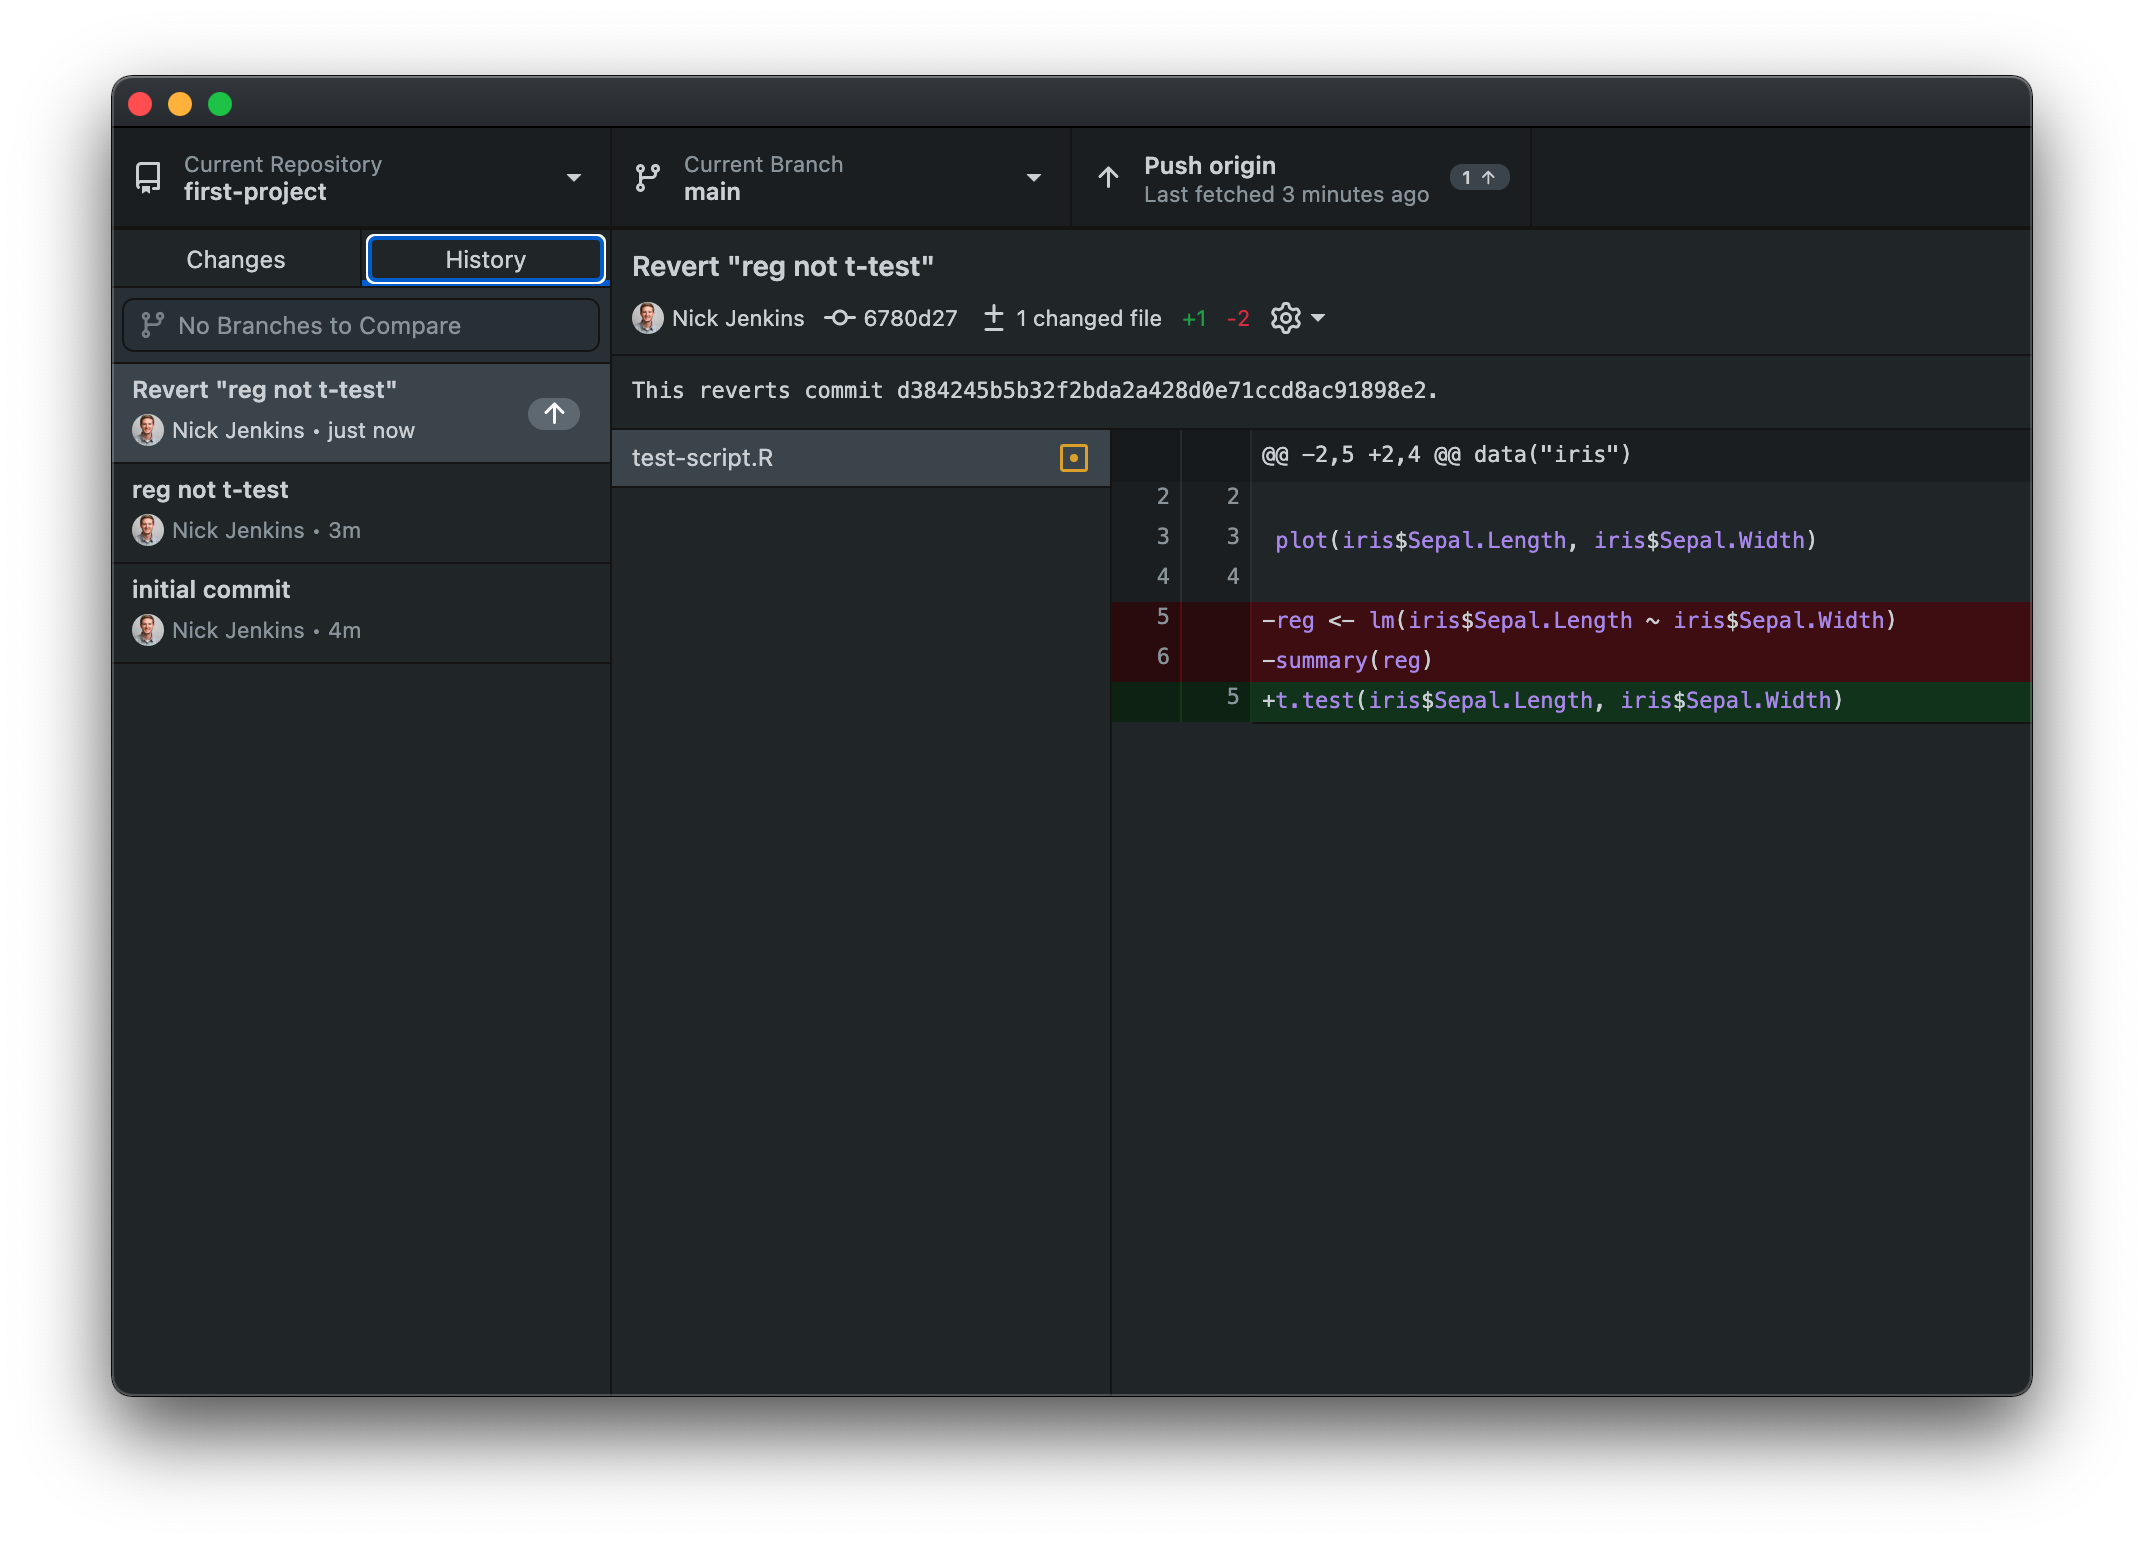
After you push the changes, you will see that your R script file got updated.
Sharing Your Repository for Collaboration
Because Git is designed to track changes, it is an excellent collaboration tool. To add a collaborator to your project, go to your repository on GitHub.com, click “Settings”, then “Manage Access.”
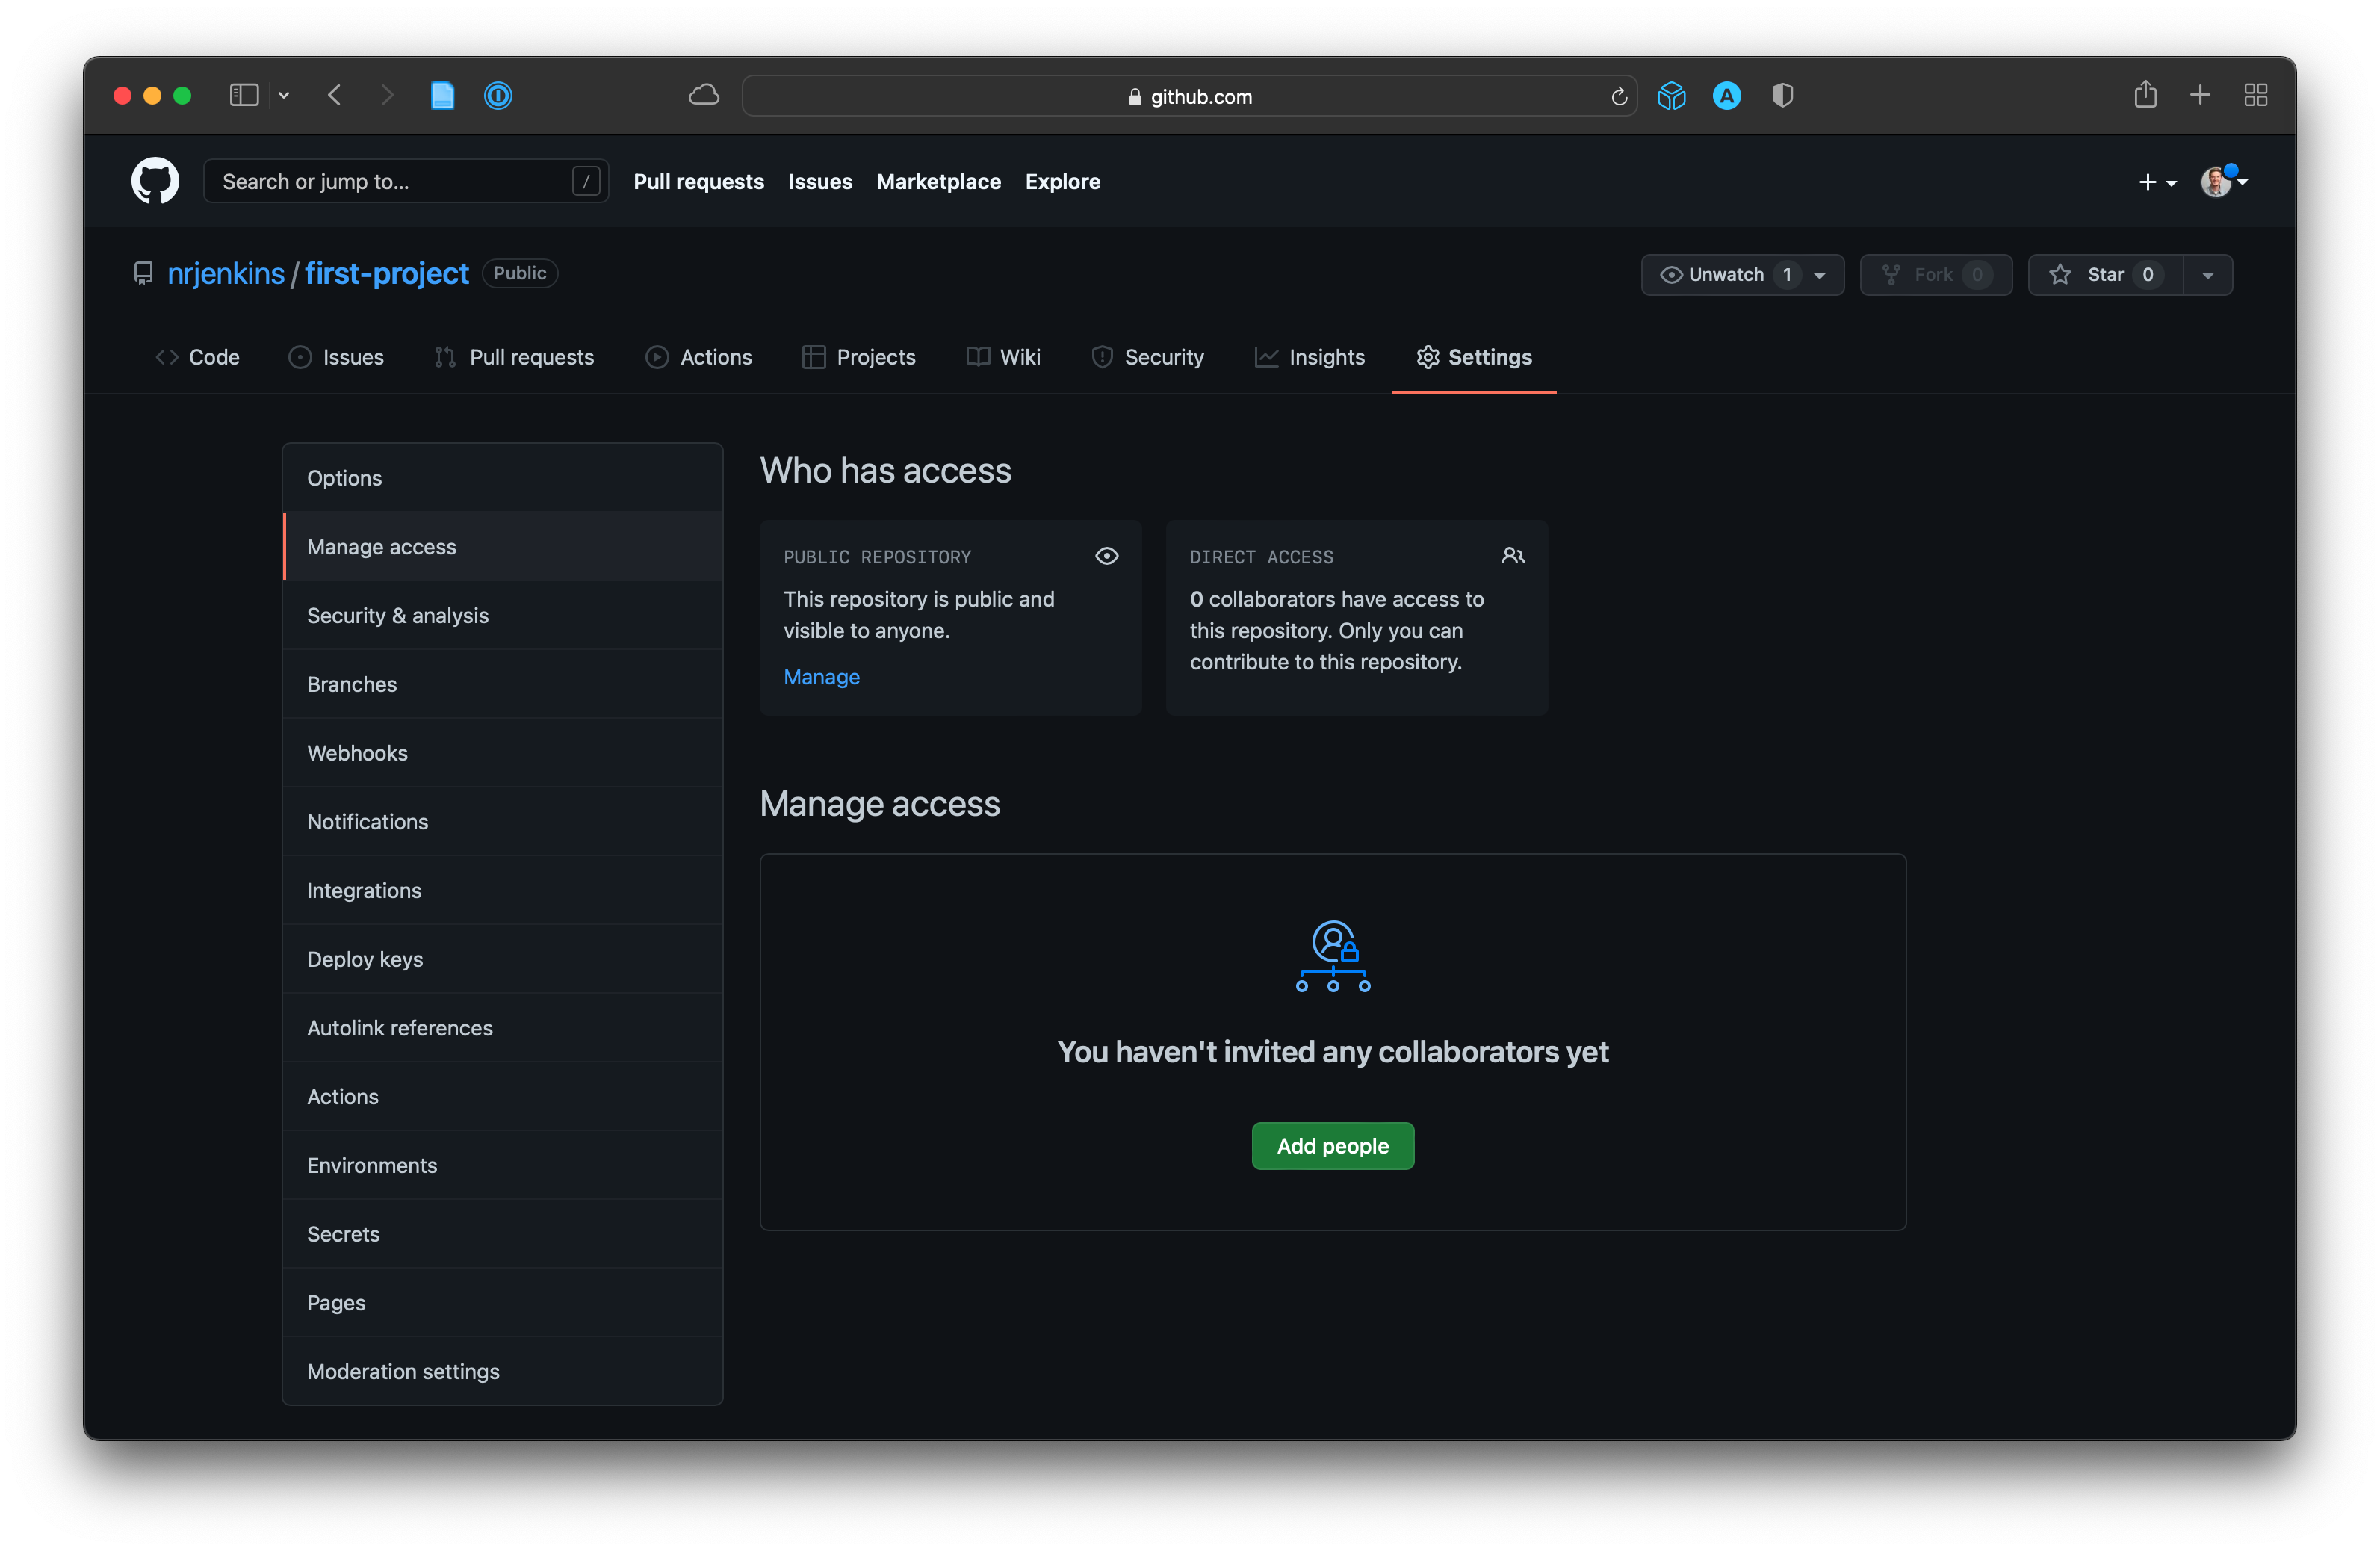
When you click “Add people” you can just type in their email address and they will receive an invite. What do they do when they get the invite? They clone the repository to their machine just like we just did. All the steps are the same. Anytime your collaborators make changes and push them, the files will be updated for everyone. You can even go into the commit history to see exactly what changes were made.
Using Git in the Terminal
GitHub Desktop makes is pretty easy to use GitHub, but the traditional way to use Git is by entering commands in the Terminal. You can accomplish every thing we did above using only Terminal commands. Let’s see how this works by creating another repository.
Creating a New Repo
We start by creating a new folder for our repo on our local machine. I’m going to put my folder here: ~/Documents/GitHub/second-project. Notice that I named it second-project.
mkdir ~/Documents/GitHub/second-projectThen I’ll navigate to that folder and initialize it as a GitHub rep.
cd ~/Documents/GitHub/second-project
git init
Adding Files
Before we can commit anything to the repository, we need to add a file. I’m just going to copy test-script.R to the new folder. Note: you can also do this manually.
cp ~/Documents/GitHub/first-project/test-script.R ~/Documents/GitHub/second-project/Now, if we check the status of our repo, we’ll see that test-script.R is ready to be added. Adding a file means that we are putting it in the queue to be committed.
git statusLet’s add test-script.R to the queue to be committed…
git add test-script.RCommitting and Pushing Changes
… and now commit the changes to the master branch (the -m means “master”)…
git commit -m "Adding an R script file"… and push them:
git remote add origin https://github.com/nrjenkins/second-projectHow do I …
The Terminal offers more functionality that I won’t cover here. To help you with additional commands, you can always type git –help:
git --helpCreating a Reproducible Workflow
Git and GitHub are an integral component of developing a reproducible workflow. Because Git is designed to document changes, it is perfect for cataloging the steps that a researcher takes to clean, visualize, and analyze data. This helps keep us accountable. If all of the code for a project, and all of the changes we made to that code, is publicly available, we could follow all of the steps that researchers took on a project. Scary, right?
In general, your scientific workflow should probably follow these steps:
- Create a new git repository for your project (you can keep it private)
- Create your code files and commit changes on a regular basis as you work on them
- Write your manuscript (Git works amazing with LaTeX) and commit changes as you write
- Finish the project/publish and make your repo public
Next Step
Use R and Git to build a website! Check out the excellent guild to build your own website: https://www.apreshill.com/blog/2020-12-new-year-new-blogdown/#step-6-sculpt-site
Resources for Further Learning
Here is a collection of some of the resources I’ve come across on using Git for scientific projects: